Tired of your old, dated tiles? A full tear-out is a huge, messy job. You want a fresh look but dread the downtime and cost of a complete renovation.
Yes, you can install flexible stone directly over existing tiles. To ensure success, the original tile surface must be solid, completely clean, and flat. Using the correct specialized adhesive is also critical for a strong, long-lasting bond that won't fail over time.
This is a question I get all the time from contractors and project managers. The idea of saving time and money by avoiding demolition1 is very appealing. And the good news is, it's absolutely possible. I've seen it done successfully on many projects, from commercial renovations to residential upgrades. But the success of the project depends entirely on doing the prep work right. If you skip the preparation, you're just setting yourself up for problems down the road. Let's look at what you need to do to get it right.
What preparation is needed before installing over old tiles?
Worried your new flexible stone will just fall off? A poor installation can turn a dream renovation into a nightmare. You need to be sure the new material will stick.
The key to a lasting installation is careful surface preparation2. You must check that the old tiles are solid, clean the surface thoroughly, and ensure it's perfectly flat before applying the specialized adhesive. This guarantees a strong bond and a professional finish.
In my experience as a manufacturer, the material itself is only half the story. The other half is installation. A great product installed poorly will always fail. When my clients—distributors and contractors—ask about installing flexible stone over old tiles, I always give them a strict checklist. It’s not complicated, but you can’t skip any steps.
1. Check the Base
First, you need to check the existing tiles. Tap each tile gently with a rubber mallet3 or the handle of a screwdriver. If you hear a hollow sound, it means the tile is loose or "drummy." Any loose, cracked, or hollow tiles must be removed. You can't stick something new onto a base that isn't stable. After removing the bad tiles, you need to fill in the empty spots with a repair mortar4 or cement slurry to make the wall or floor level with the other tiles. The goal is a completely solid foundation5.
2. Clean the Surface
Next, the surface has to be perfectly clean. Over the years, tiles collect dust, grease, wax, and soap scum. The adhesive won't stick to any of that. You need to give the entire surface a deep clean6. Use a strong degreaser or tile cleaner to remove all the grime. After cleaning, rinse the surface with water and let it dry completely. A clean, dry surface is essential for the adhesive to grab on properly.
3. Ensure Flatness
Flexible stone is flexible, but it won't hide major bumps or dips in the surface underneath. The surface needs to be flat. I recommend using a long straightedge to check for flatness. Any deviation should be less than 2 millimeters. If you find low spots or the grout lines7 are very deep, you’ll need to apply a thin layer of leveling compound8 or tile adhesive to flatten the entire area. This extra step ensures your final flexible stone installation looks smooth and professional, not wavy.
| Base Condition | Required Action | Why It's Important |
|---|---|---|
| Solid & Flat | Deep clean the surface to remove all dirt and grease. | Adhesive needs a clean, stable surface to bond correctly. |
| Minor Unevenness | Apply a thin skim coat of leveling compound8. | Ensures the final surface is smooth and professional. |
| Loose/Hollow Tiles | Remove loose tiles, fill gaps, then clean and level. | Prevents the new material from failing because the base was unstable. |
What is flexible stone made of, anyway?
You hear about new building materials all the time. But what exactly is "flexible stone"? Is it real stone? Is it just a type of plastic? Understanding the material is key.
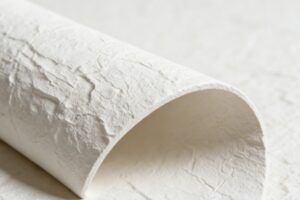
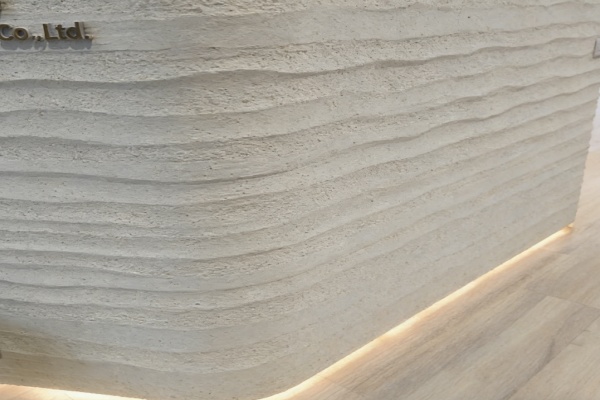
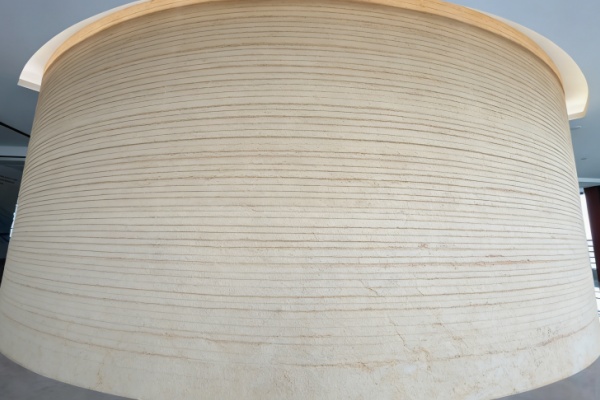
Flexible stone, which we often call soft porcelain, is an innovative material made from natural inorganic powders like clay, stone powder, and volcanic ash. These are mixed with a polymer and formed without high-temperature firing, making it flexible and lightweight.
When I first started working with flexible stone, I was amazed by its properties. It’s very different from the traditional porcelain tiles we’ve been making for years. The manufacturing process itself explains why it behaves so differently.
The Science Behind Flexible Stone
To make flexible stone, we start with natural, inorganic raw materials. Think natural clay, stone powder, quartz sand, and even volcanic ash. We gather these materials and sort them by their natural color—usually red, yellow, gray, and white. Then, we grind them into a super-fine powder. This powder is then modified to make it highly "active." We call this our "eco-friendly active clay." This active powder is then mixed with a special polymer. The mixture is shaped and dried at a specific curve of temperatures. It’s not fired in a kiln at 1200°C like traditional tiles. This unique process is what gives the material its flexibility.
How Traditional Tiles are Different
Traditional porcelain tiles are also made from natural materials, mainly clay, quartz, and feldspar. But the process is completely different. These raw materials are ground into a powder, pressed into a tile shape under immense pressure, and then a glaze might be applied. The crucial step is firing. The tiles are baked in a kiln at extremely high temperatures, over 1200°C. This process, called sintering9, is what makes them incredibly hard, dense, and rigid. There is no flexibility at all.
Here’s a simple breakdown:
| Feature | Flexible Stone (Soft Porcelain) | Traditional Porcelain Tile |
|---|---|---|
| Raw Materials | Natural inorganic powders (clay, stone powder) + polymer | Clay, quartz, feldspar |
| Process | Powder modification, mixing, low-temp curve drying | Pressing, glazing, high-temperature firing (sintering9) |
| Key Property | Flexible, lightweight | Rigid, hard, dense |
| Feel | Warm, textured | Cold, smooth |
Understanding this difference is key for our B2B clients. It helps them explain the value to their own customers, whether they are architects looking for a lightweight facade material or contractors doing a quick interior renovation.
How does the installation process actually differ?
You know preparation is key, but what about the actual installation? Is it really easier? The cost of labor and time on a project is huge, so any efficiency is a big win.
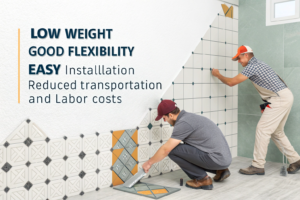
Yes, installing flexible stone is generally simpler and faster, especially for renovations. You can often apply it directly over old tiles, saving huge amounts of time on demolition1. The adhesive methods are also more versatile compared to traditional tile installation.
The biggest selling point I discuss with importers and distributors is the reduced installation complexity. For contractors, time is money. A faster, simpler installation process means they can complete more jobs and reduce labor costs. This benefit is passed all the way down to the end customer.
Traditional Tile Installation
Installing traditional porcelain tiles is heavy work. If you're renovating, you almost always have to start by demolishing the old wall or floor. This is a dusty, noisy, and time-consuming job. Once you have a clean substrate, you mix cement-based tile adhesive and apply it with a notched trowel10. You then have to carefully set each heavy, rigid tile in place, using spacers to get the grout lines7 perfect. For large formats or exterior walls, you might even need a mechanical dry-hanging system, which is even more complex and expensive.
Flexible Stone Installation
Flexible stone simplifies this process dramatically. As we discussed, for a renovation, you often don't need to tear out the old tiles. You just clean and prep the surface. The installation itself is also easier.
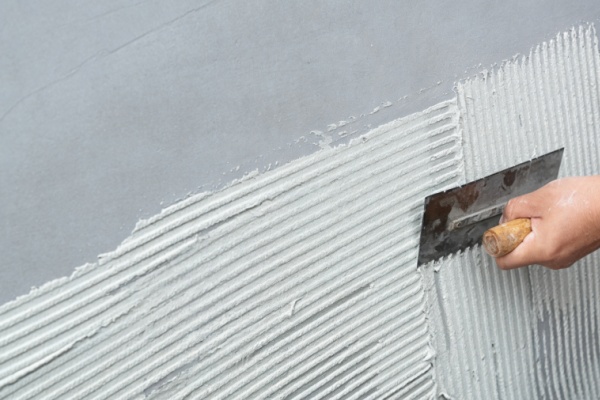
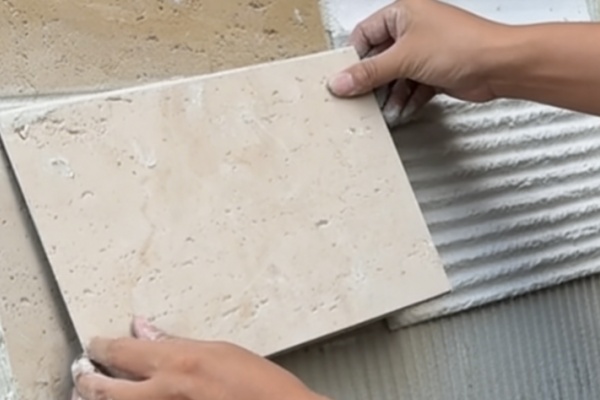
- For exterior walls: We recommend using a specialized polymer adhesive mortar11. You apply it to the wall or the back of the sheet with a notched trowel10, ensuring full coverage (at least 80%). Then you press the sheet into place and tap it with a rubber float to ensure a solid bond.
- For interior walls: You have more options. You can use the same adhesive mortar, or for an even faster and cleaner job, you can use special paste-like adhesives or even high-strength double-sided tapes12. This makes it perfect for quick updates in commercial spaces or homes where you want to minimize disruption.
Here is a comparison for a typical wall renovation project:
| Installation Step | Traditional Porcelain Tile | Flexible Stone |
|---|---|---|
| 1. Demolition | Required. Tear out old tiles and substrate. | Not Required. Install directly over clean, solid tiles. |
| 2. Surface Prep | Repair and level the substrate after demolition1. | Clean and level the existing tile surface. |
| 3. Adhesive | Mix cement-based tile adhesive. | Use specialized polymer mortar, paste, or tape. |
| 4. Setting | Set heavy, rigid tiles one by one with spacers. | Apply lightweight, flexible sheets quickly. |
| 5. Grouting | Grout all joints after adhesive cures. | Grout joints with low-alkali grout13 for exteriors. |
This simplified process is a huge advantage for our professional clients. It means less mess, less labor, and faster project completion.
Conclusion
Installing flexible stone over existing tile is an excellent, efficient solution for renovations. With proper surface preparation2 and the right adhesive, it provides a durable, beautiful finish that saves time and labor.
Learn how flexible stone can be installed without the need for messy and time-consuming demolition. ↩
Understand the essential steps in surface preparation to ensure a successful and durable flexible stone installation. ↩
Find out how a rubber mallet can help you assess the stability of your existing tiles before installation. ↩
Learn when repair mortar is necessary to create a stable base for your flexible stone project. ↩
Explore why a stable base is crucial for the longevity and success of your flexible stone renovation project. ↩
Find out the best methods to thoroughly clean your tiles, ensuring the adhesive bonds properly for a flawless finish. ↩
Get tips on handling grout lines to ensure a seamless and professional appearance with flexible stone. ↩
Learn when and how to apply leveling compound to achieve a smooth, professional finish with flexible stone. ↩
Understand the process of sintering and how it affects the properties of traditional porcelain tiles. ↩
Discover the technique of using a notched trowel to ensure even adhesive application for flexible stone. ↩
Understand the application of polymer adhesive mortar to ensure a secure and efficient installation of flexible stone. ↩
Explore the use of double-sided tapes for a quick and clean installation of flexible stone on interior walls. ↩
Learn about the benefits of low-alkali grout in maintaining the integrity and appearance of flexible stone exteriors. ↩