Installing flexi stone can be daunting. A mistake can ruin your project's look and budget. I will guide you through the professional steps for a flawless installation.
To install flexi stone correctly, start by preparing a clean, flat wall1. Apply a specialized adhesive2, press the tiles firmly into place, and then carefully grout the joints. For corners, use specific techniques like mitering3 to ensure a seamless look. Always follow key precautions.
That's the quick overview, but the real secret to a great installation is in the details. Getting the wall prep, adhesive choice, and corner finishing right makes all the difference. Let's break down each stage so you can handle your project with confidence.
How Do You Install Flexi Stone on a Flat Wall?
Tiling a flat wall looks simple, but mistakes can lead to an uneven finish. I’ll show you two professional methods to ensure your flexi stone looks perfect.
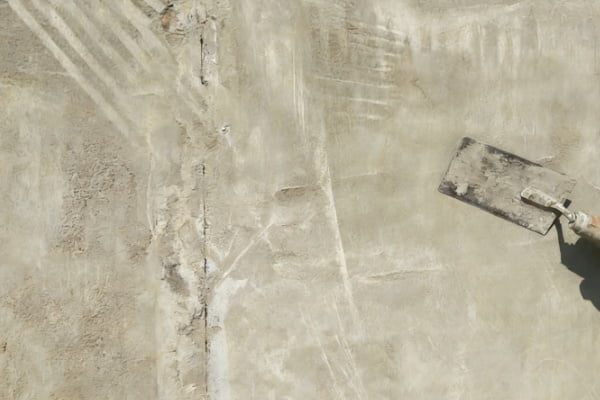
For flat walls, use either a cement-based adhesive4 or a special colorless one. The key is to apply the adhesive evenly, press each tile firmly, and keep your grout lines consistent5. Both methods require careful wall preparation and precise application for a professional result.

Choosing the right installation method for a flat surface is your first big decision. I've used both cement and colorless adhesives in my projects, and each has its place. Your choice depends on the project's needs and the desired look for the grout lines. The cement adhesive method is very traditional and robust. The colorless adhesive method is great when you want the wall's base color to show through as the grout color.
Cement vs. Colorless Adhesive
I find it helpful to compare the steps directly. This helps me decide which process is better for the job at hand.
Here’s a quick comparison of the steps I follow for each:
| Step | Cement Adhesive Method | Colorless Adhesive Method |
|---|---|---|
| Adhesive | Mix a special cement adhesive; use it within 2 hours. | Use a special colorless adhesive; apply tiles while it's white. |
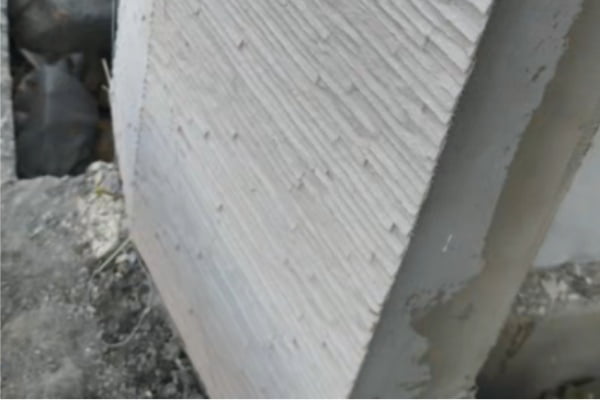
| Application | Trowel a 1-3mm layer and create ridges for a strong grip. | Roll or brush on about 0.65kg per square meter. |
| Grouting | Clean joints, then fill with grout using a grout bag for a clean finish. | The base coat color becomes the grout color, which is very efficient. |
| Finishing | Apply a protective top coat over everything if the project requires it. | Roll a final top coat over the tiles and into the joints. |
No matter which method you choose, always remember to work from the top down. And always use level lines to keep your installation perfectly straight.
What Is the Best Way to Handle Corners with Flexi Stone?
Corners can make or break a tiling job. A sloppy corner looks unprofessional and can ruin the entire effect. Let's go over two methods for creating clean, sharp corners.
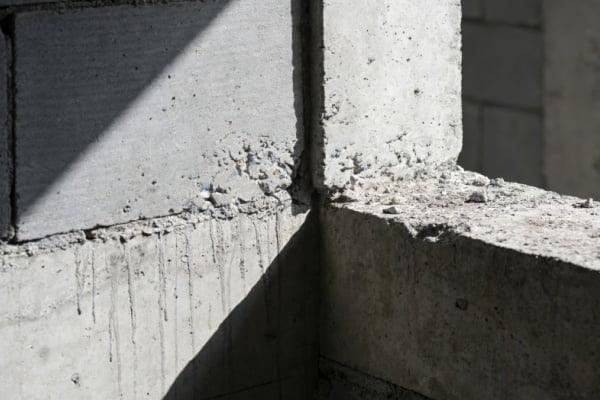
The best way to handle corners is to either butt the tiles together with a small gap for grout or create a 45-degree mitered joint6. Both methods require careful measurement and application to achieve a seamless, professional finish that looks like a single, solid surface.
Getting corners right is an art, but it's one you can master. The method you choose depends on the look you're after. I use a simple butt joint7 for a more rustic feel and a mitered joint for a high-end, seamless appearance. Both are great options when done correctly.
External Corner Butt Joint
This is the simpler method. You just install the tiles on each side of the corner, leaving a 1-2mm gap between them. Then, you carefully fill this gap with grout. The key here is to tool the grout joint so it's smooth and deep, creating a clean, defined line. After it's semi-dry, I scrape away any excess grout and clean the surface with a dry sponge.
45-Degree Mitered Joint
For a truly professional look, I always miter the corners. It takes more time but the result is worth it. Here's how I do it:
- Grind: Use a small grinder to carefully cut a 45-degree angle on the edge of each tile that will meet at the corner.
- Apply: Apply adhesive to the wall and press both mitered tiles into the corner, ensuring they meet perfectly.
- Fill: If there are any tiny gaps, fill them with a matching grout for a seamless look.
- Sand: Once the grout is dry, I lightly sand the corner to make it perfectly smooth and rounded. This gives a very clean, high-end finish.
What Are the Key Precautions for Flexi Stone Installation?
Even a perfect installation can fail over time. Hidden issues with the wall can cause stains or adhesion failure. Here are the key precautions I take to prevent problems.
Key precautions include treating new walls with an alkali-resistant primer8 to prevent staining. For any wall, especially concrete, ensure it's waterproof. When renovating, always completely remove any old, deteriorating paint9 or tiles to guarantee the new adhesive bonds properly to a solid surface.
From my years of experience as a tile supplier, I've learned that preparation is everything. The clients who report the best long-term results are the ones whose installers pay attention to the wall itself. Skipping these simple checks is the most common reason I see installations fail down the line. It's about thinking ahead to what could go wrong.
Dealing with Different Wall Types
The condition of your wall surface is critical. I always advise my clients to have their installers assess it before they even mix the adhesive.
- New Walls: New concrete and plaster are alkaline. This alkali can bleed through and stain your tiles. I always recommend applying a good quality alkali-resistant primer8 first. It's a simple step that saves a lot of trouble.
- Concrete Walls: I tell installers to check concrete walls for any signs of moisture or water seepage10. If there's any doubt, apply a layer of waterproofing membrane11 before the tiles. A dry base is a stable base.
- Renovation Projects: When you're tiling over an old surface, you must check its condition. If the old paint is peeling or the old tiles are loose, you can't just tile over them. I always insist that everything is scraped off down to the solid wall12. It's more work upfront, but it guarantees your new flexi stone tiles will stay put for years.
Conclusion
By preparing your walls, choosing the right method, and finishing corners carefully, you can install flexi stone like a pro. Your project will look great and last for years.
A clean, flat wall is the foundation of a successful tile installation. Learn how to prepare it properly to ensure your tiles adhere well and look flawless. ↩
Choosing the right adhesive is crucial for the durability of your tiles. Discover the best options to ensure your tiles stay in place for years. ↩
Mitering is a technique that can elevate the look of your tile corners. Learn how to do it right for a professional, seamless appearance. ↩
Cement-based adhesive is a traditional choice for tile installation. Find out why it's preferred and how it can benefit your project. ↩
Consistent grout lines are key to a professional finish. Learn techniques to maintain even spacing and achieve a polished look. ↩
A 45-degree mitered joint offers a high-end finish for tile corners. Learn the steps to achieve this seamless and professional look. ↩
A butt joint is a simple method for handling tile corners. Discover how it can create a rustic feel and when it's the best choice for your project. ↩
An alkali-resistant primer can prevent staining and ensure a clean finish. Find out why it's a crucial step in tile preparation. ↩
Removing old paint is essential for proper tile adhesion. Discover effective methods to prepare your wall for a new tile installation. ↩
Moisture can compromise tile adhesion. Find out how to detect and address water seepage to protect your tile installation. ↩
A waterproofing membrane can protect your tiles from moisture damage. Learn how to apply it to ensure a stable and long-lasting installation. ↩
Ensuring a solid base is crucial for tile longevity. Learn why scraping down to the solid wall is necessary for a successful installation. ↩