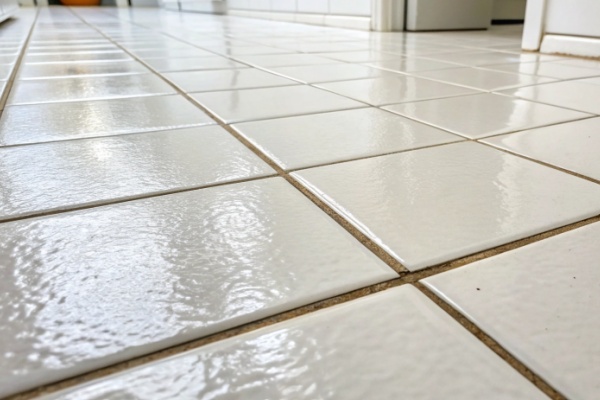
Are your new tile floors looking unfinished? Dirty, ugly gaps between tiles can ruin the whole look and collect grime, making cleaning a nightmare for you.
To grout your ceramic floor tiles, you must first clean the gaps thoroughly. Then, you mix the grout with water1 to a paste-like consistency. Next, you apply it with a grout float, pressing it into the gaps. Finally, you clean the excess grout2 off the tile surface before it hardens.

Getting the grouting process right is key to a long-lasting and beautiful tile floor. I've been in the tile manufacturing business for years, and I've seen how a good grout job can make all the difference. But before we get into the "how," let's talk about the "why." Many people wonder if it's even necessary. Understanding this is the first step to a perfect finish.
Why should I even grout my tile gaps?
Thinking about skipping the grout to save time? This decision can lead to dirty, moldy gaps that are impossible to clean and might even damage your tiles over time.
You must grout tile gaps to account for thermal expansion and contraction3. Grouting prevents dirt, water, and bacteria4 from getting into the gaps. This keeps your floor clean, hygienic, and looking good for years. It also adds strength and stability5 to the entire tiled surface.
As a tile manufacturer, we always design tiles to be installed with a gap. This is not just for looks. Tiles, like most materials, expand when they get warm and shrink when they get cool. Without a gap, they would push against each other and could crack or pop up.
The grout fills this gap and acts as a flexible buffer6. But it does much more. An open gap is a trap for everything you don't want on your floor. Dust, dirt, spilled liquids, and food crumbs all find their way in there. Over time, this mixture can grow mold and bacteria, which is unhealthy and creates bad odors. A properly grouted joint is sealed, smooth, and easy to clean, protecting both your health and your investment.
| Feature | Ungrouted Gaps | Grouted Gaps |
|---|---|---|
| Cleanliness | Traps dirt, grime, and bacteria | Smooth, sealed, and easy to clean |
| Durability | Tiles can shift and crack | Locks tiles together, adding strength |
| Health | Can grow mold and mildew | Prevents moisture and mold growth |
| Appearance | Looks unfinished and messy | Provides a clean, professional finish |
What's the right way to apply traditional grout?
Are you worried about making a mess when applying grout? Applying it incorrectly can lead to uneven lines, weak joints, and a finish that you are not happy with.
For a professional finish, apply grout 24 hours after tiling. First, clean the joints. Next, mix the grout to a paste. Apply it with a rubber float at a 45-degree angle. Finally, wait 15-30 minutes, then clean the excess off the tiles with a damp sponge.
I've seen many clients rush this step, so I always advise taking your time. The process is straightforward if you follow the steps.
Step 1: Surface Preparation
You must wait at least 24 hours after the tile adhesive has set. The gaps, or joints, must be completely clean. Use a small tool or a vacuum to remove any dust, debris, or dried adhesive. If the joints are dirty, the grout won't stick properly.
Step 2: Mixing
Follow the manufacturer's instructions. Usually, you add the grout powder to a bucket with clean water. I recommend using a low-speed drill with a mixing paddle for a smooth, lump-free paste. Let the mixture sit for about 10 minutes. This allows the chemicals to activate. Then, give it one final mix before you start.
Step 3: Application
Scoop some grout onto your rubber grout float. Hold the float at a 45-degree angle to the tile surface and spread the grout diagonally across the joints. Make sure you press down firmly to pack the grout deep into the gaps.
Step 4: Cleaning
This is the most critical part. After about 15-30 minutes, the grout will start to harden. Use a damp, not wet, sponge to gently wipe the excess grout off the tile surface. Rinse your sponge in a bucket of clean water often. After a few hours, a light haze may appear on the tiles. You can polish this off with a clean, dry cloth.
What are modern epoxy grouts7 and are they better?
Is your old cement grout cracking and staining? Traditional grouts can absorb water and dirt, leading to discoloration and mold, forcing you to scrub them constantly.
Modern epoxy grouts7 are a mix of resin and a hardener8. They are waterproof, stain-proof, and extremely durable. Unlike traditional cement grout, epoxy grout does not crack, shrink, or get discolored, making it a superior choice for wet areas like kitchens and bathrooms.
In my business, we've seen a huge shift towards epoxy-based grouts, and for good reason. They solve most of the problems people have with traditional cement grout. Think of it as an upgrade. There are a few main types of resin-based materials you will see. "Beauty grout" or "Porcelain grout" are usually terms for epoxy-based products that come in a two-part cartridge for a caulk gun. They cure to a very hard, non-porous finish9.
Then there is epoxy sand grout, which includes fine sand for a more traditional, matte texture. It's incredibly durable. The main benefit is performance. Because epoxy grout is non-porous, it doesn't absorb water or stains. Spills like wine or coffee just wipe right off.
It also inhibits the growth of mold and mildew, making it perfect for showers and kitchen backsplashes. While it can be more expensive and requires a more careful application process, the long-term benefits are huge. You get a finish that stays looking new for years with minimal maintenance.
| Grout Type | Material | Pros | Cons |
|---|---|---|---|
| Traditional Grout | Cement-based | Inexpensive, easy to apply | Porous, stains easily, can crack |
| Epoxy Grout | Resin-based | Waterproof, stain-proof, durable | More expensive, harder to apply |
| Epoxy Sand Grout | Resin & Sand | Very durable, matte texture | Most expensive, complex application |
How do I choose the right grout color for my tiles?
Afraid of choosing a grout color that you will later regret? The wrong color can make your beautiful new tiles look busy, dated, or just plain wrong.
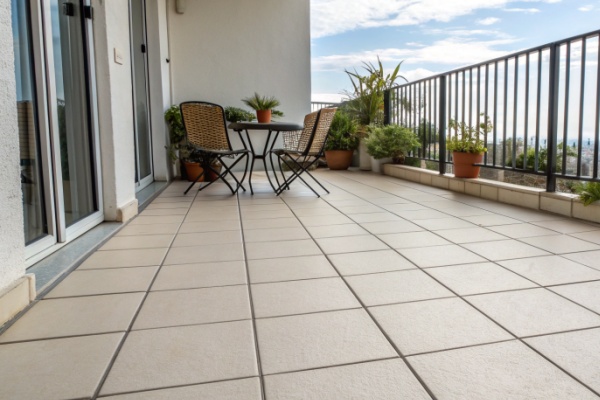
To choose the right grout color, first decide on the look you want. For a seamless look, match the grout to the tile color10. For a bold, grid-like pattern, choose a contrasting color. When in doubt, a neutral gray or white11 is almost always a safe and classic choice.
I always tell my clients that grout color is a design choice, just like the tile itself. It has a big impact on the final look. Here are some simple tips I've gathered over the years to help you choose.
Tip 1: Match the Tile
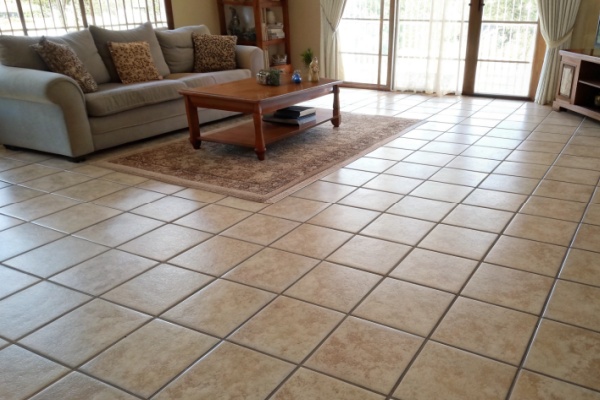
If you have tiles with a beautiful pattern, like a marble-look or stone-look porcelain, choosing a grout color that matches the main color of the tile creates a unified, seamless look. This makes the space feel bigger and puts the focus on the tiles themselves, not the grout lines.
Tip 2: Create Contrast
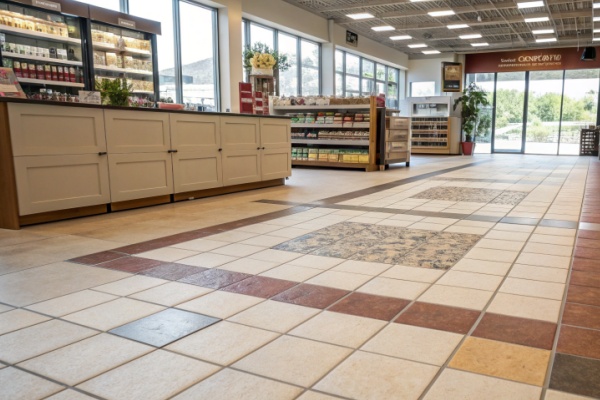
For simple, solid-colored tiles, a contrasting grout can be very effective. For example, classic white subway tiles look fantastic with a dark gray or black grout. This creates a graphic, grid-like pattern that can feel modern or industrial. It really makes the shape of each tile stand out.
Tip 3: Go Neutral
If you are unsure, you can't go wrong with a neutral color. White is a clean and classic choice for any tile. Light gray is another fantastic option because it provides a subtle contrast without being too bold, and it's better at hiding minor dirt than pure white.
A Word of Caution
Be very careful with trendy or glittery "pearlescent" grouts. In my experience, what looks glamorous today can often look very dated and tacky in just a few years. Simplicity often has the most lasting appeal.
How do I apply modern epoxy grout correctly?
Intimidated by the process of applying epoxy grout? It's less forgiving than cement grout, and a mistake can mean sticky, hardened residue that is very difficult to remove.
To apply epoxy grout, first clean the joints and tape the tile edges or apply wax. Then, use a caulk gun to apply the grout into the joint. Tool the joint immediately with a steel ball or shaper. Let it cure for 24 hours, then peel off the excess.
Applying epoxy grout is more about precision than speed. I've guided many partners through this process, and the key is preparation and working in small, manageable sections. Unlike cement grout, you can't just wipe it all down at the end.
Step 1: Clean and Prepare
The joints must be perfectly clean and dry. For an easier cleanup, I highly recommend applying a special release wax to the tile edges next to the joint. Just be careful not to get any wax inside the joint itself, as this can prevent the epoxy from sticking.
Step 2: Apply the Grout
Epoxy grout usually comes in a two-part cartridge. You'll put a special mixing nozzle on the end. As you squeeze the trigger of the caulk gun, the two parts mix together. Apply a steady, even bead directly into the joint. Don't work on too large of an area at once. I suggest an area you can finish in about 15 minutes.
Step 3: Tool the Joint
Immediately after applying the bead of grout, you need to shape it. Use a steel ball tool12 or a plastic shaper to press the grout into the joint. This creates a smooth, consistent finish and removes any excess. Move at a steady pace and at about a 45-degree angle.
Step 4: Clean Up
This is the best part. After the grout has cured for about 24 hours, the excess that squeezed out onto the wax will be like a plastic strip. You can simply peel it right off. If any residue remains, you may need a special epoxy grout cleaner13 to remove it.
Conclusion
Properly grouting your tiles is essential. It protects your floor, makes cleaning easier, and provides a beautiful, professional finish that will last for many years to come.
Mixing grout to the right consistency is key to a successful application. Discover the best techniques for achieving the perfect grout mix. ↩
Removing excess grout without damaging tiles is vital for a clean finish. Learn the best practices for grout cleanup. ↩
Understanding thermal expansion helps prevent tile damage. Explore why this concept is crucial for long-lasting tile installations. ↩
Grout acts as a barrier against contaminants. Discover how it keeps your floors clean and hygienic. ↩
Grout not only fills gaps but also reinforces the tile structure. Learn how it contributes to a durable floor. ↩
Grout's flexibility prevents tile cracking. Understand its role in accommodating tile movement. ↩
Epoxy grouts offer superior durability and resistance. Find out why they might be the better choice for your project. ↩
The combination of resin and hardener makes epoxy grout waterproof and durable. Learn how this chemistry benefits your tiles. ↩
A non-porous finish prevents stains and moisture absorption. Discover how this feature enhances grout performance. ↩
Matching grout to tile color creates a cohesive appearance. Learn how this choice affects your tile design. ↩
Neutral grout colors are versatile and timeless. Find out why they are often recommended for various tile designs. ↩
A steel ball tool ensures smooth grout joints. Learn how to use it for a professional epoxy grout finish. ↩
Epoxy grout requires special cleaning methods. Learn how to effectively remove residue without damaging your tiles. ↩