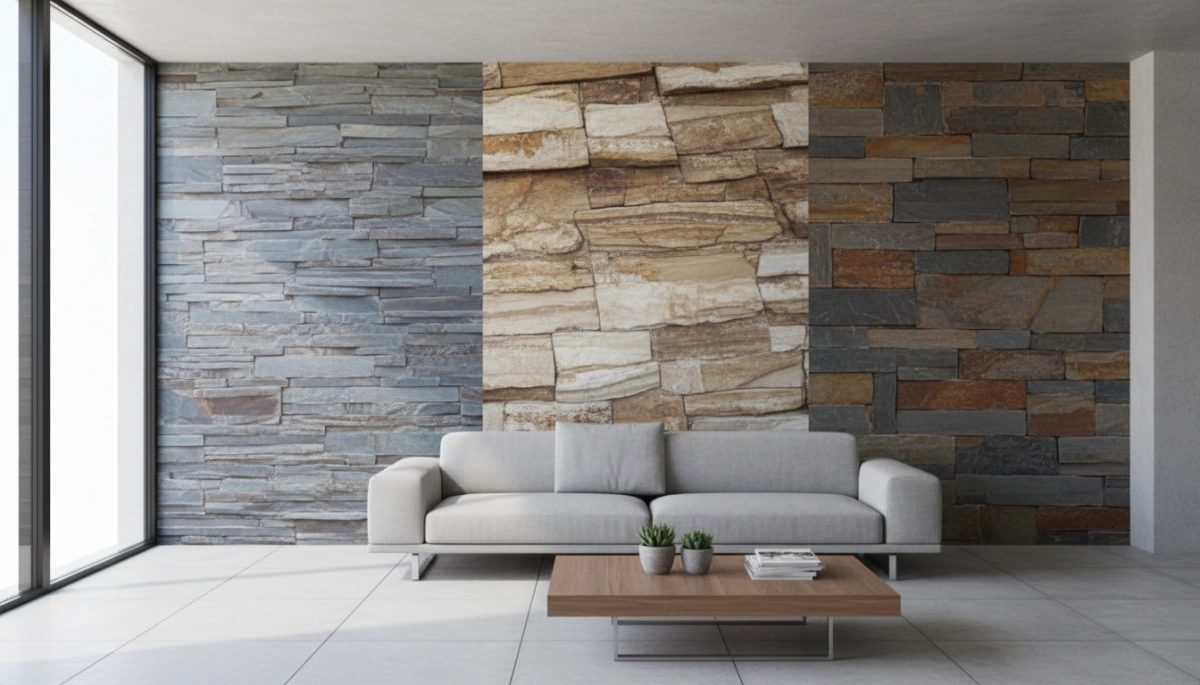
What is Flexible Natural Thin Stone Veneer?
Definition and Thickness Specifications
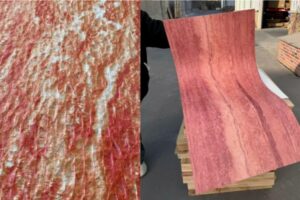
Flexible natural thin stone veneer is a revolutionary surfacing material that combines the authentic beauty of real stone with modern engineering. Unlike synthetic imitations, this product starts with genuine slate, quartzite, or sandstone. A thin layer of this natural stone is peeled away and bonded to a flexible backing—often fiberglass and resin or a fabric substrate. This process retains the unique texture, color variations, and mineral deposits of the original rock while creating a material that is incredibly lightweight and pliable.
Standard Specifications:
| Feature | Specification |
|---|---|
| Material Composition | natural stone powder and high-molecular polymer materials. |
| Total Thickness | Typically 1.0mm to 3.0mm (approx. 1/16 to 1/8 inch) |
| Weight | Ultra-lightweight, averaging 2.0 – 4.0 kg/m² (approx. 0.3 – 0.4 lbs/sq ft) |
| Flexibility | Can bend around curved surfaces (radius varies by stone type) |
| Standard Sheet Sizes | Common formats include 1200x600mm (2×4 ft) and larger custom panels |
Traditional Full-Bed Stone vs. Flexible Natural Thin Stone Veneer
Understanding the difference between traditional masonry and flexible veneer is crucial for project planning. While full-bed stone offers structural support, flexible thin stone is purely an aesthetic cladding solution designed for efficiency and ease of installation.
Comparison at a Glance:
- Weight & Load: Traditional full-bed stone requires a structural footing or reinforced foundation to support its massive weight. Flexible thin stone is light enough to be applied directly to existing substrates without additional structural reinforcement.
- Installation Speed: Full-bed masonry requires skilled stonemasons, mortar mixing, and significant time. Flexible veneer installs much like a heavy-duty laminate or tile, using adhesives and simple cutting tools (like tin snips or a table saw), drastically reducing labor costs.
- Space Usage: Traditional stone eats into valuable floor space, often requiring 4-6 inches of depth. Flexible veneer adds mere millimeters to the wall, preserving the room’s dimensions.
- Versatility: You cannot wrap a solid rock around a round column. Flexible stone sheets can easily conform to curves, arches, and furniture faces.
Can You Install Flexible Stone Veneer Over Drywall?
Yes, absolutely. One of the primary advantages of flexible natural thin stone veneer is its compatibility with standard interior substrates. Because the material is exceptionally lightweight (often lighter than large-format ceramic tile), standard drywall is perfectly capable of supporting the load without sagging or failing.
Key Installation Surfaces:
- Drywall/Plasterboard: The most common interior application. Requires a clean, dust-free, and primed surface.
- MDF & Plywood: Ideal for cabinetry, doors, and furniture applications.
- Concrete & Brick: Can be applied directly provided the surface is leveled.
- Existing Tiles: In renovation projects, it can often be installed directly over old tiles if they are securely bonded, saving demolition time.
This capability makes it a favorite for quick interior renovations, allowing homeowners and designers to transform a plain painted wall into a textured stone feature wall in a single day.
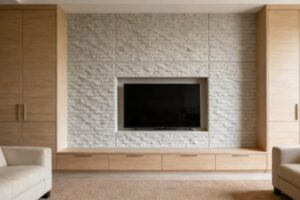
Benefits of Using Thin Stone Veneer for Interior Walls
Authentic Aesthetic Appeal
Nothing beats the look of real rock. Flexible stone captures the exact texture, color, and depth of a solid block. It instantly elevates any space, bringing a high-end, natural vibe directly into a modern bedroom design or a central living area.
Lightweight Design and Space Efficiency
Traditional masonry eats up valuable square footage. That is exactly where ultra-thin stone sheets make a massive difference for interior spaces.
- Zero Floor Loss: The thin profile preserves your room’s original dimensions.
- No Wall Reinforcement: This lightweight stone mounts safely on standard drywall without requiring heavy-duty structural support.
Cost-Effectiveness and Ease of Handling
Managing a project budget matters. Because the material is so light, freight and shipping costs drop significantly compared to full blocks. You also benefit from easy installation. I’ve found that crews can handle these sheets without heavy lifting equipment, slashing labor times and cutting overall project costs.
Sustainable and Eco-Friendly Material Choices
I always prioritize green building practices. Choosing Natural Thin Stone Veneer for Interior Wall Applications means we extract far less raw material from the earth. It is an efficient use of natural resources that dramatically lowers the project’s carbon footprint.
| Sustainability Factor | Full-Bed Stone | Thin Stone Veneer |
|---|---|---|
| Quarry Extraction | Massive material removal | Highly efficient, minimal waste |
| Transport Emissions | Heavy loads, high fuel use | Lightweight, low carbon footprint |
| Jobsite Waste | Significant cutting debris | Near-zero installation waste |
Popular Flexible Natural Stone Veneer Styles and Profiles
When choosing natural thin stone veneer for interior wall applications, the right style sets the tone for your entire space. Whether we are upgrading a corporate lobby or refining a cozy bedroom design, we offer a variety of profiles to fit your exact aesthetic.
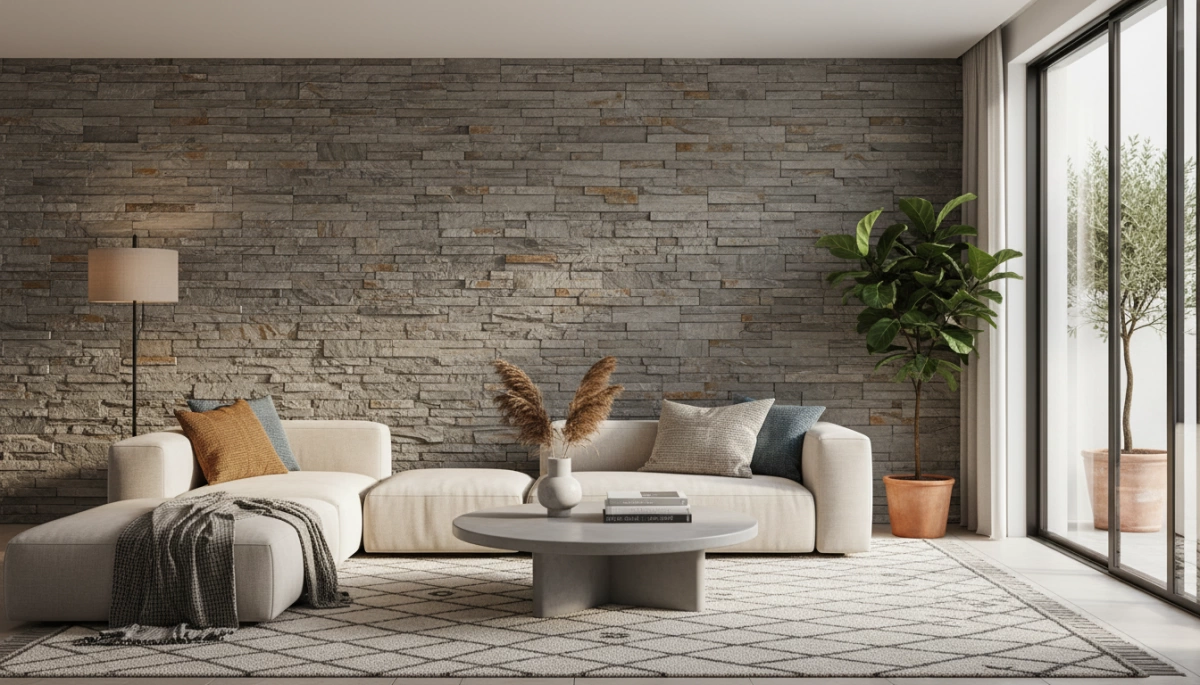
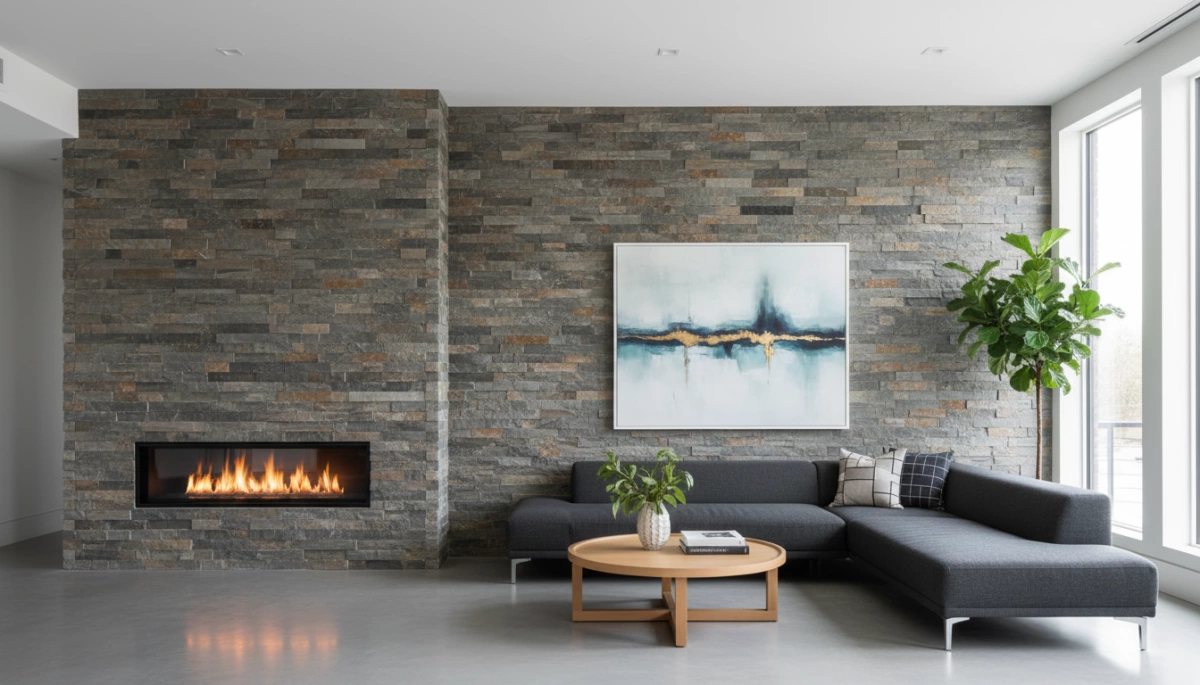
Ledgestone and Ashlar Cuts
If you want a traditional masonry look without the heavy lifting, these cuts are our top recommendations.
- Ledgestone: Features rugged, narrow, stacked stone strips for a highly textured, shadow-rich surface.
- Ashlar: Uses mixed rectangular shapes for a more structured, classic appearance.
Both styles give you the authentic look of full bed stone but function as lightweight stone, guaranteeing an easy installation directly over standard indoor wall substrates.
Mosaic and Round Patterns
For projects needing a more organic or rustic feel, we rely on natural, free-flowing shapes.
- Mosaic Profiles: Jagged, irregular pieces fitted together to create a dynamic, rugged finish.
- Round Patterns: Smooth, river-washed stone shapes that build a warm, earthy, and welcoming atmosphere.
Modern Flexible and Translucent Stone Options
Innovation in our manufacturing process allows us to offer cutting-edge flexible stone products that push the boundaries of interior design.
- Ultra-thin stone sheets: These panels can actually bend, making them the perfect solution for wrapping around structural columns, tight corners, and curved walls.
- Translucent panels: Real natural stone cut so thin that light can pass right through it. They are ideal for backlighting custom bars, reception desks, or modern feature walls.
Quick Style Comparison
| Profile Style | Best For | Key Feature |
|---|---|---|
| Ledgestone | Accent walls, fireplaces | Deep texture, stacked appearance |
| Ashlar | Formal spaces, clean lines | Rectangular, structured layout |
| Mosaic / Round | Rustic interiors, cozy rooms | Organic, natural, and free-flowing shapes |
| Flexible / Translucent | Modern designs, curved surfaces | Bendable, extremely lightweight, backlight-ready |
Ideal Interior Wall Application Scenarios
When I consult with clients about upgrading their spaces, the sheer versatility of natural thin stone veneer for interior wall applications always takes center stage. Because we are working with lightweight stone, you aren’t held back by heavy structural load limits. Here are the most effective ways to use this material in your space.
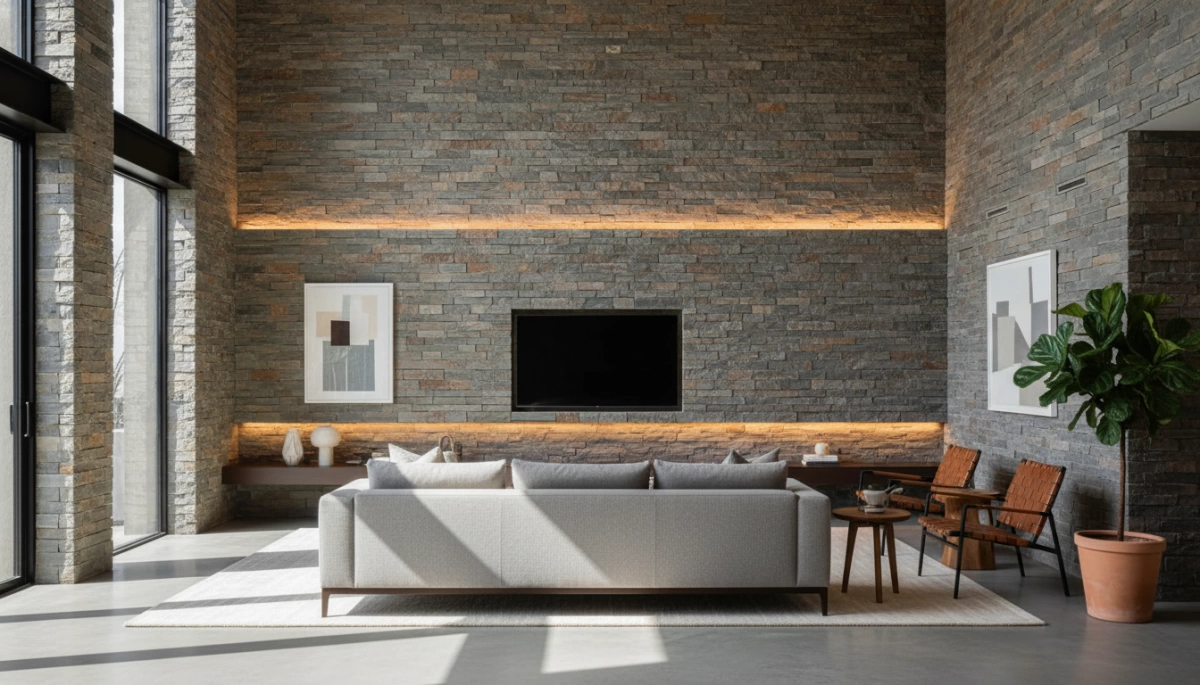
Living Rooms and Fireplaces
A standard wall transforms completely when wrapped in natural textures.
- Accent Walls: Create a striking backdrop for your media center or seating area.
- Fireplace Surrounds: Get that massive, classic hearth look without needing reinforced floors.
- Bedroom Design: An accent wall behind the bed using ultra-thin stone sheets adds instant warmth and premium texture to a master suite.
Kitchens and Islands
Kitchens demand materials that look custom but can handle a high-traffic environment.
- Backsplashes: Thanks to easy installation, upgrading your cooking space is fast and minimally disruptive.
- Islands and Peninsulas: Wrapping the seating side of an island in flexible stone protects the drywall from shoe scuffs while instantly upgrading the room’s aesthetic.
Wet Bars and Bathrooms
Intimate or entertaining spaces benefit heavily from the depth of natural stone.
| Space Focus | Application Strategy |
|---|---|
| Wine Cellars | Deliver an authentic, old-world tasting room atmosphere. |
| Wet Bars | Add an upscale, moody lounge feel behind open shelving. |
| Bathrooms | Use sealed stone behind vanity mirrors or free-standing tubs for a spa-like retreat. |
Hallways and Entryways
First impressions matter, yet transitional spaces often lack character.
- Entryway Niches: Frame your main entrance to welcome guests with immediate visual impact.
- Stairwells: Running stone veneer up a multi-story stairwell creates a dramatic vertical feature that seamlessly ties your floor levels together.
How to Install Thin Stone Veneer Indoors
Installing natural thin stone veneer for interior wall applications is straightforward if you follow the right steps. Because we are working with ultra-thin stone sheets, you get the benefit of easy installation without needing heavy structural support. Here is how I tackle the process from start to finish to ensure a flawless finish.
Preparing Wall Surfaces and Substrates
Your final result is only as good as the surface underneath. Before hanging any lightweight stone, the wall must be clean, dry, and structurally sound.
- Drywall: Perfectly fine for dry, stable areas like a modern bedroom design accent wall, provided you use a good primer first.
- Cement Backer Board: My top recommendation for wet areas like backsplashes or when using slightly heavier stone cuts.
- Plywood or OSB: Requires a moisture barrier and metal lath if you plan to use traditional mortar.
- Painted Walls: Always scuff the existing paint with coarse sandpaper so the adhesive can bond directly to the actual wall substrate.
Gathering Tools, Mortar, and Adhesives
Having the right gear makes handling flexible stone a breeze. You do not need a massive masonry setup, but here is a quick breakdown of the essentials I always keep on site:
| Item Type | Specific Materials Required |
|---|---|
| Cutting Tools | Heavy-duty tin snips, angle grinder, or small wet saw |
| Bonding Agents | Polymer-modified thinset mortar or premium construction adhesive |
| Application Gear | Notched trowel (1/4 inch), margin trowel, heavy-duty grout bag |
| Finishing Supplies | Stiff masonry brush, clean sponges, penetrating stone sealer |
Layout Planning and Stone Setting
Do not just start sticking panels to the wall blindly. A little preparation guarantees the pattern looks organic and prevents awkward, tiny cuts at the edges of your wall.
- Dry Fit the Pattern: Lay out your stones on the floor first. This allows you to mix colors, textures, and sizes naturally before anything is permanent.
- Mark Level Lines: Use a laser level or standard level to snap horizontal chalk lines on the wall. Keeping your initial rows straight is critical for a professional look.
- Apply the Adhesive: Spread your mortar or adhesive onto the wall using a notched trowel. For maximum grip, I always back-butter the back of each individual stone.
- Set the Stone: Press the stone firmly into place, wiggling it slightly to collapse the trowel ridges and push out any trapped air pockets.
Grouting, Cleaning, and Sealing
The final steps lock in the durability and the authentic aesthetic of your new interior feature.
- Fill the Joints: If you are not opting for a tight dry-stack appearance, use a grout bag to carefully squeeze mortar into the gaps between the stones.
- Tool the Grout: Wait until the mortar is thumb-print hard. Then, use a striking tool to shape the joints and a masonry brush to sweep away loose debris.
- Clean Immediately: Wipe any stray adhesive or mortar off the face of the stone with a damp sponge before it cures. Dried mortar is incredibly difficult to remove.
- Apply the Sealer: After the entire wall is completely dry and cured, apply a high-quality penetrating stone sealer. This step is non-negotiable as it protects the stone from dust and keeps the natural colors vibrant.
Maintenance and Care for Indoor Stone Veneer
Keeping your natural thin stone veneer for interior wall applications looking flawless is simple. I always remind our customers that because these materials are used indoors, they are protected from harsh weather. With just a little regular care, your walls will stay vibrant for decades.
Routine Cleaning and Dusting
Daily upkeep for our ultra-thin stone sheets takes practically no time at all.
- Dry Dusting: Run a microfiber duster or a soft-bristle vacuum brush over the wall once a week to prevent dust buildup.
- Spot Cleaning: If dirt or smudges appear, wipe the surface with a soft, damp cloth and a drop of mild, pH-neutral dish soap.
- What to Avoid: Never use bleach, vinegar, ammonia, or abrasive scrubbing pads. These will permanently damage the surface of your flexible stone.
Inspecting and Touching Up Mortar Joints
Thanks to a highly easy installation process, these walls are highly durable. However, normal house settling can occasionally cause hairline cracks in traditional mortar lines.
- Yearly Check: Do a quick visual inspection of your walls once a year.
- The Fix: Press a small amount of matching pre-mixed grout or stone caulk directly into any visible gaps.
- Wipe Clean: Always wipe the lightweight stone clean immediately before the touch-up material has a chance to dry.
Re-Sealing for Longevity
Applying a quality sealer protects against moisture and stains, which is especially important whether your stone is featured in a high-humidity kitchen or a cozy bedroom design.
| Application Area | Recommended Sealing Frequency | Best Sealer Type |
|---|---|---|
| Dry Walls (Living Rooms, Bedrooms) | Every 3 to 5 Years | Standard water-based penetrating sealer |
| High-Use/Wet Areas (Kitchens, Baths) | Every 1 to 2 Years | High-performance impregnating stone sealer |
How to Re-Seal:
- Clean the stone completely and allow it to dry for 24 hours.
- Apply the penetrating sealer evenly using a foam brush, paint roller, or soft cloth.
- Buff off any excess sealer pooling on the surface after 15 minutes to prevent a cloudy, hazy finish.