Understanding Flexible Stone Veneer
What is Flexible Stone Veneer?
is produced using inorganic raw materials including natural clay and stone powder, together with polymer modifiers and colorants. The materials are crushed and milled into fine powder, blended in fixed ratios, then mixed with emulsion and water to form a paste. After vacuum degassing, the paste is distributed into textured molds and pressed to form sheets. These sheets are cured at a low temperature of 80–180°C, demolded once cooled, then cut to required dimensions, trimmed, and finished with a dustproof coating. After quality inspection, qualified products are packed. The entire production avoids high-temperature firing, featuring environmental protection and low energy consumption.
Real Stone vs. Manufactured Alternatives
Unlike manufactured “faux” stone products made from molded concrete or plastics, flexible stone veneer features a 100% natural stone surface.
- Authentic Texture: You get the genuine variations in color and texture found in slate, quartzite, or marble.
- Structural Integrity: It does not fade or wear like painted alternatives.
- Weight Advantage: It provides the high-end look of solid masonry without the immense weight or the need for heavy-duty structural support.
Key Characteristics and Thickness
This material is designed to be as functional as it is aesthetic. Its unique composition allows it to be used in spaces where traditional stone would be too bulky or difficult to manipulate.
- Ultra-Thin Profile: Most sheets maintain a thickness of only 3mm to 9mm, allowing for seamless integration.
- Extreme Flexibility: It can be applied to curved walls, circular columns, and uneven surfaces.
- Large Format: Available in large sheets that minimize seams and speed up the installation process.
- Durability: Despite its thinness, the resin backing provides incredible tensile strength and impact resistance.
Why Flexible Stone Veneer is Ideal for DIY and Professionals
I always tell my clients that the ease of installing flexible stone veneer completely changes the game for modern building and design. Whether you are a homeowner tackling weekend DIY projects or a professional contractor managing large commercial builds, this product simply makes sense. It effectively bridges the gap between high-end architectural aesthetics and practical, everyday application.
Lightweight and Easy to Handle
Because it is a true lightweight material, you do not need heavy machinery, reinforced walls, or extra labor just to move it around.
- No heavy lifting: Transporting and positioning the sheets is easily manageable for a single person.
- Faster workflow: Professionals save valuable hours on the job site.
- Safer environments: Drastically reduces physical strain during any standard wall renovation.
Flexibility for Curved Surfaces and Columns
Traditional stone is rigid, heavy, and unforgiving. In contrast, flexible veneer bends to fit the exact contours of your design vision.
- Wraps effortlessly: Easily covers round pillars, arches, and curved walls.
- Simple surface preparation: Adheres smoothly to most existing substrates without requiring intense demolition.
- Seamless finishes: Achieves a continuous, high-end stone look on complex architectural features.
Cost-Effective and Eco-Friendly Benefits
You secure the luxury of natural stone without the massive price tag or the heavy environmental impact. It is the ultimate upgrade for smart home improvement.
| Feature | Traditional Stone | Flexible Stone Veneer |
|---|---|---|
| Weight Profile | Extremely heavy | Ultra-lightweight |
| Installation | Requires specialized masonry | Fast, simple adhesion |
| Eco-Impact | High resource extraction | Low material usage |
| Project Cost | Expensive materials & labor | Highly budget-friendly |
By significantly reducing transportation emissions and utilizing only a micro-thin layer of actual stone, we provide a durable product that respects both your project budget and the planet.
Essential Tools and Materials for Installation

The ease of installing flexible stone veneer is largely due to the fact that you don’t need a truckload of heavy machinery. Most of these items are already in your garage or available at any local hardware store, making it a perfect choice for quick home improvement tasks.
Required Cutting and Measuring Tools
Because the material is so thin and manageable, you can skip the wet saw. I recommend having these basics on hand to ensure precision:
- Tin Snips or Heavy-Duty Scissors: Perfect for making quick, manual adjustments or trimming edges.
- Table Saw or Circular Saw: Use a fine-toothed blade if you are looking for perfectly straight, professional-grade lines on large DIY projects.
- Measuring Tape and Carpenter’s Square: Essential for planning your layout and ensuring every piece fits tightly.
- Sandpaper (120-180 grit): Great for smoothing out edges after a cut for a seamless finish.
Recommended Adhesives and Sealants
The bond is what makes the installation permanent. Since this is a lightweight material, you don’t need thick mortar beds.
- Modified Silane (MS) Polymer Adhesive: This is my top pick for most surfaces because it offers an immediate grab and remains flexible.
- Polyurethane (PU) Adhesive: A reliable alternative that works well in various climates.
- Stone Sealer: Depending on the look you want (matte or wet), a high-quality impregnating sealer protects the natural stone face from stains and moisture.
Surface Preparation Supplies
A successful wall renovation depends entirely on how well the surface is prepped. You cannot skip this part if you want the adhesive to do its job.
- Cleaning Agents: Use a degreaser or simple alcohol-based cleaner to remove dust, oil, or old paint flakes.
- Microfiber Cloths: To ensure the back of the stone veneer and the wall are completely dust-free before glue hits the surface.
- Primer: If you are working on highly porous surfaces like raw plaster or certain woods, a quick coat of primer ensures the adhesive doesn’t soak in too fast.
Pre-Installation Preparation
Preparation is the foundation of a successful project. To truly experience the ease of installing flexible stone veneer, you need to ensure the environment and the materials are ready before the first sheet hits the wall. Skipping these steps often leads to avoidable mistakes.
Surface Inspection and Cleaning
I always emphasize that your installation is only as good as the surface beneath it. The substrate must be structural, dry, and free of any debris.
- Remove Contaminants: Wipe down the surface to clear away dust, grease, or oils that could interfere with the adhesive bond.
- Check for Level: While the stone is flexible, the wall should be relatively flat. Sand down high spots and fill in deep divots.
- Substrate Check: Ensure the material you are sticking to—whether it is drywall, plywood, or masonry—is stable and not peeling.
Measuring and Layout Planning
Don’t start gluing until you have a visual roadmap. Planning your layout ensures the natural variations in the stone look intentional and balanced.
- The Dry Lay: I recommend laying out all your sheets on the floor first. This allows you to mix and match different textures and shades for the best aesthetic flow.
- Find the Center: Mark a vertical and horizontal center line on your wall. Starting from the middle and working outward prevents you from ending up with tiny, awkward slivers of stone at the edges.
- Account for Outlets: Mark where any light switches or outlets will sit so you can pre-cut those sections accurately.
Acclimating the Veneer Sheets
Natural stone materials react to temperature and humidity. To prevent the sheets from expanding or contracting after they are installed, they need to adjust to your home’s environment.
- Unpack and Flatten: Remove the sheets from their shipping crates or boxes and lay them flat.
- Wait Time: Let the sheets sit in the installation room for at least 24 to 48 hours.
- Temperature Control: Keep the room at a consistent, “lived-in” temperature during this period to ensure the material reaches a stable state.
Step-by-Step Guide to Installing Flexible Stone Veneer
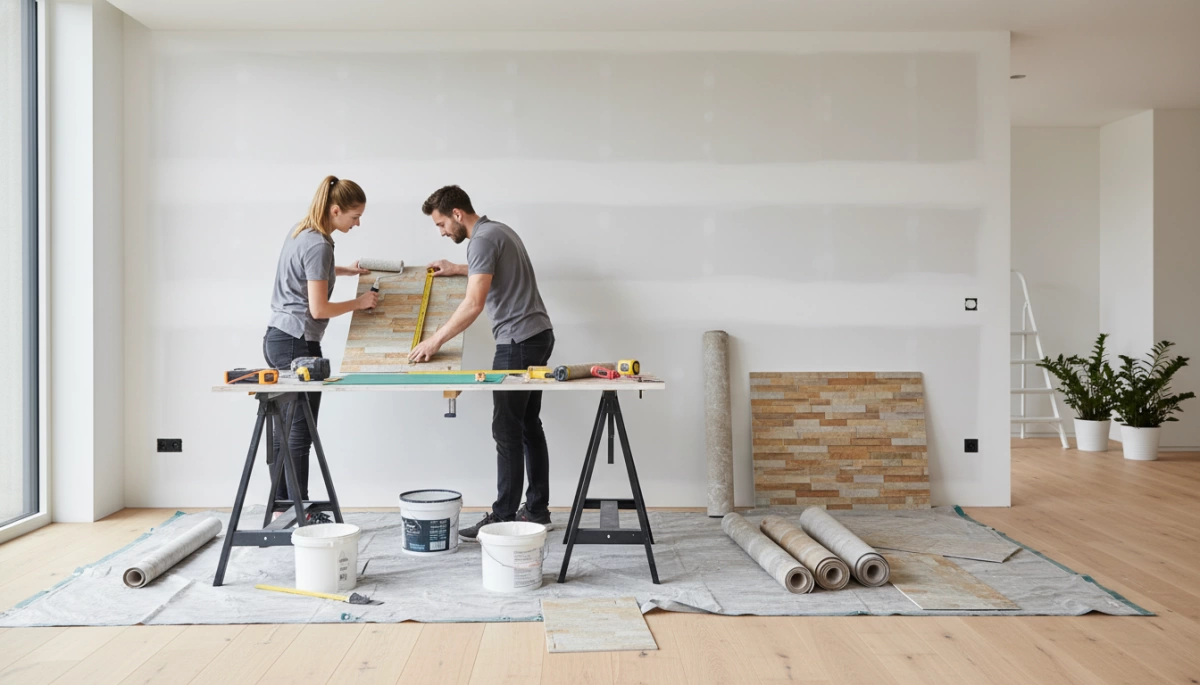
Cutting the Veneer to Size
One of the best things about this material is that it doesn’t require a wet saw or heavy machinery. I find that heavy-duty shears or tin snips work best for most straight cuts. If you are working on a more detailed wall renovation, a standard oscillating tool or a fine-toothed hand saw handles curves and outlet cutouts with ease. Always remember to measure twice and cut from the back of the sheet to ensure the stone face remains crisp and chip-free.
Applying the Adhesive Correctly
To get a bond that lasts, you need the right grab. I recommend using a high-quality polymer adhesive or a polyurethane-based glue.
- Use a 3mm notched trowel to spread the adhesive evenly across the back of the sheet.
- Ensure 100% coverage to prevent hollow spots.
- Leave a small gap near the very edge to stop the adhesive from oozing out when you press the sheet against the wall.
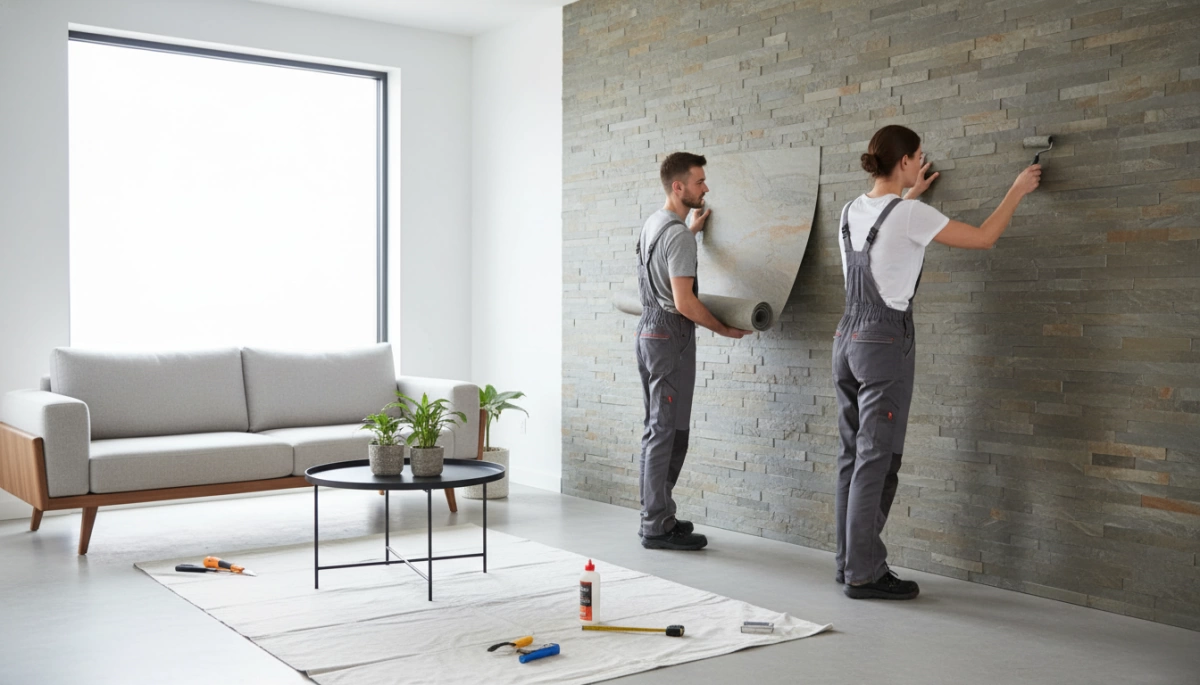
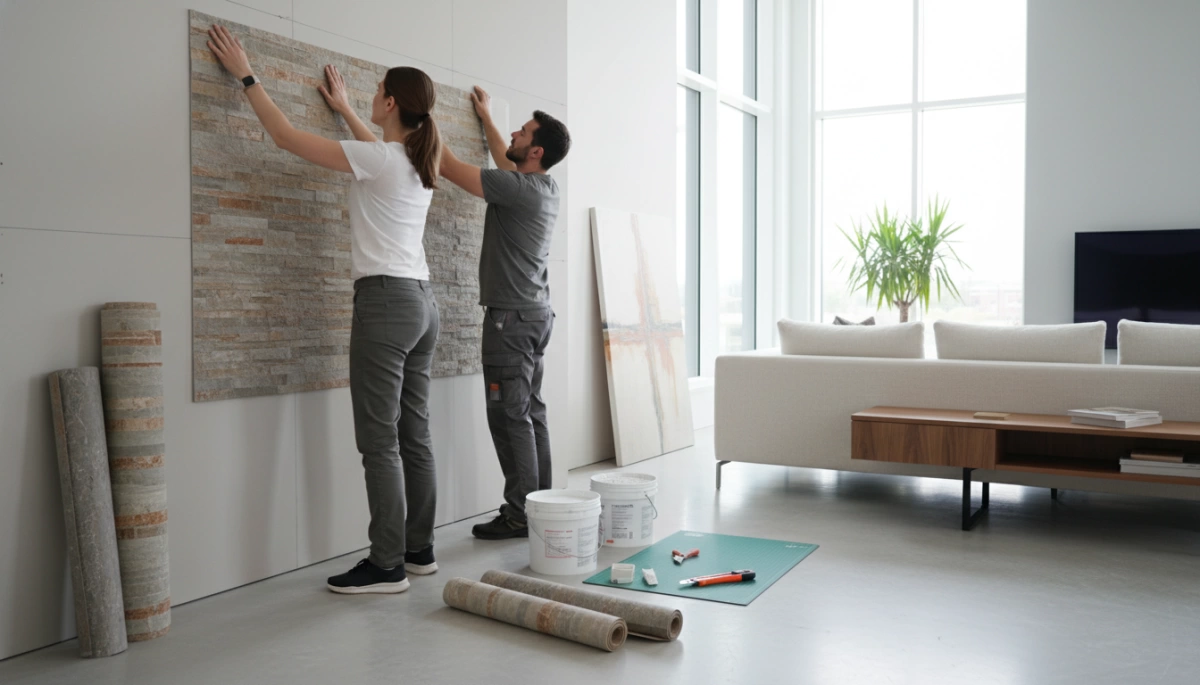
Placing, Pressing, and Leveling Sheets
The Ease of Installing Flexible Stone Veneer is most apparent during the mounting phase. Because the material is so lightweight, you can easily maneuver the sheets into place without help. Start from a corner or your level baseline and press the sheet firmly onto the surface. I always use a rubber pressure roller to go over the entire area. This removes air pockets and ensures the stone is perfectly flat and fully bonded to the substrate.
Finishing Edges and Final Touches
Once the sheets are set, the details make the difference. If you prefer a seamless “book-matched” look, butt the edges tightly together. For a more traditional masonry style, leave a small uniform gap for grout.
- Sanding: Use fine-grit sandpaper to lightly smooth any sharp edges at the joints.
- Cleaning: Wipe away any stray adhesive or dust with a damp cloth immediately.
- Sealing: Apply a high-quality stone sealer to enhance the color and provide a protective layer against moisture and stains, ensuring your DIY project looks professional for years.
Versatile Applications of Flexible Stone Veneer
The ease of installing flexible stone veneer makes it a top choice for a wide range of projects. Because it is thin and adaptable, we can apply it to surfaces where traditional heavy stone would be impossible to use.
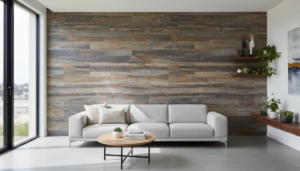
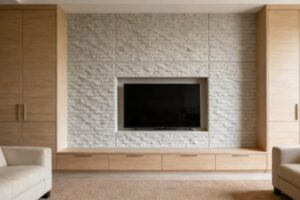
Interior Walls and Feature Backsplashes
In residential and commercial interiors, this material transforms plain drywall into a high-end focal point. It is particularly popular for:
- Feature Walls: Creating a natural stone texture in living rooms or bedrooms.
- Kitchen Backsplashes: Providing a heat-resistant and stylish surface behind stoves.
- Bathroom Accents: Adding a spa-like feel to vanity areas and non-shower walls.
Exterior Facades and Weather Resistance
Flexible stone veneer is built to withstand the elements, making it a durable option for outdoor home improvement. Its natural stone layer provides excellent UV resistance and handles temperature fluctuations without cracking.
- Building Facades: Enhancing curb appeal with a real stone finish on exterior walls.
- Column Wraps: Easily bending around structural supports to create a solid stone look.
- Outdoor Living: Covering patio walls or outdoor kitchen islands for a seamless transition from inside to out.
Furniture, Cabinetry, and Creative Accents
One of the most unique selling points of this material is its ability to be used on millwork and furniture. Since it is so lightweight, it doesn’t add significant weight to movable objects.
- Cabinet Doors: Giving kitchen or office cabinets a modern, industrial stone face.
- Tabletops: Resurfacing old desks or coffee tables with a premium stone layer.
- Light Fixtures: Using translucent varieties to create glowing, stone-textured lamps and backlit panels.
Maintenance and Care for Long-Lasting Results
I always tell my clients that the ease of installing flexible stone veneer is matched only by how simple it is to maintain. Because this is real stone, it handles the elements well, but a little bit of proactive care goes a long way in keeping your home improvement project looking brand new for years.
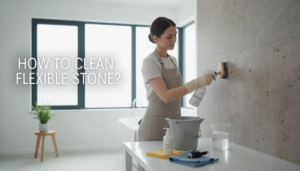
Cleaning Best Practices
Keeping your stone surfaces clean doesn’t require specialized equipment or harsh chemicals. For routine maintenance on interior wall renovation projects, follow these steps:
- Dust regularly: Use a soft microfiber cloth or a vacuum with a brush attachment to remove surface dust.
- Mild soap only: If you encounter a smudge, use warm water mixed with a drop of pH-neutral dish soap.
- Avoid abrasives: Never use steel wool, scouring pads, or acidic cleaners (like vinegar or bleach), as these can etch the natural stone surface.
When and How to Apply Sealer
Sealing is the secret to professional-grade longevity. While the stone is naturally durable, a sealer acts as a transparent shield against oils and moisture.
- Initial Sealing: I recommend applying a high-quality impregnating sealer immediately after the installation is dry. This is crucial for kitchen backsplashes or bathroom walls.
- Application Method: Use a lint-free cloth or a low-pressure sprayer to apply an even coat. Wipe off any excess after a few minutes to prevent a hazy finish.
- Frequency: For high-traffic areas or exterior facades, re-apply the sealer every 3 to 5 years to maintain maximum protection.
Ensuring Durability and Longevity
To get the most out of your lightweight material, focus on the environment it lives in. Ensure that the edges remain sealed to prevent water from getting behind the veneer, especially in outdoor settings. If you notice a loose corner over time, a quick dab of construction adhesive will fix it instantly. By following these simple steps, your flexible stone veneer will remain a centerpiece of your space without the heavy lifting of traditional masonry maintenance.
Frequently Asked Questions About Flexible Stone Installation
We get a lot of questions about how these materials behave in real-world scenarios. Here are the most common things people ask when they are looking into the ease of installing flexible stone veneer for their own projects.
Can it be installed over existing tile or wood?
Yes, and this is one of the biggest time-savers for any home improvement project. You don’t need to spend days on demolition. As long as the existing surface is structurally sound, flat, and clean, you can apply the veneer directly over:
- Old Ceramic Tile: Just ensure it is degreased and firmly attached.
- Plywood or MDF: Great for furniture upgrades or cabinetry.
- Drywall and Plaster: Perfect for quick wall renovation tasks.
Is flexible stone veneer heat resistant for fireplaces?
We often use this material for fireplace surrounds because it handles ambient heat exceptionally well. While you should never place it inside the firebox where it would touch direct flames, it is perfectly safe for the exterior facade. It won’t warp or lose its bond under normal fireplace temperatures, making it a top choice for a modern living room upgrade.
Does flexible stone veneer crack during installation?
Unlike traditional stone slabs that are brittle and heavy, this lightweight material is designed to be resilient. You won’t have to worry about the sheets snapping or cracking while you handle them.
- Durability: The fiberglass or fabric backing provides a strong reinforcement.
- Flexibility: It is specifically engineered to bend around curves without fracturing the stone face.
- Handling: You can carry large sheets across a room solo without the fear of them breaking in half.
The ease of installing flexible stone veneer comes down to this durability; it’s a forgiving material that makes DIY projects much less stressful for beginners and pros alike.