Your new tiles look amazing, but now you face the grout. You want the tightest lines possible for a seamless look, but you worry about potential problems down the road.
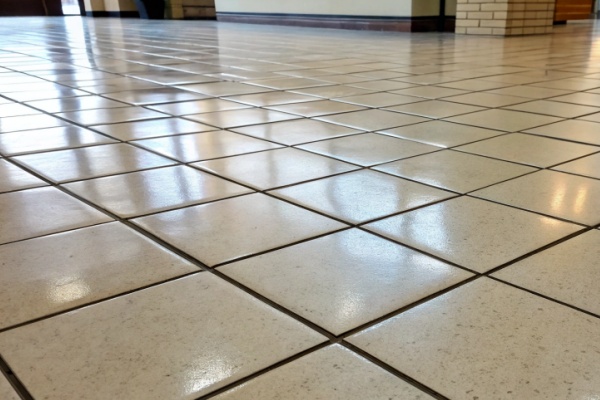
For most porcelain tiles, the tightest recommended grout line1 is 1.5mm (about 1/16 inch). This minimum gap is crucial to allow for tile size variations2 and prevent damage from thermal expansion3. Going any tighter risks tiles cracking or popping up over time.
I've seen many projects over the years as a porcelain tile manufacturer. The question of grout line width4 comes up every single time.
It's a critical decision that impacts not just the final look of your floor or wall, but also its long-term durability. A tiny gap might look great today, but it could lead to a huge headache tomorrow. We need to understand why these gaps are so important before we can decide on the perfect width for your specific project. Let's explore this topic together, so you can make an informed choice that you'll be happy with for years to come.
Why can't I just lay tiles without any gaps?
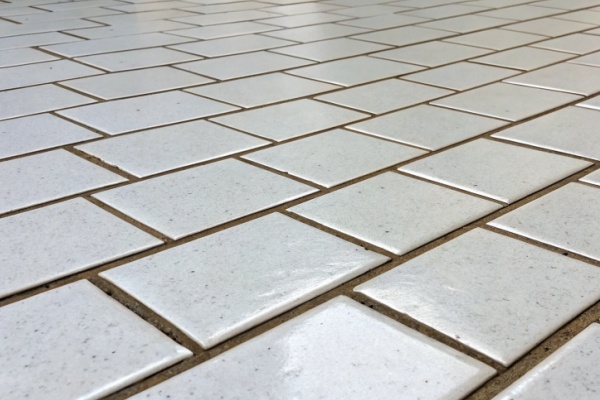
You want a perfectly smooth, monolithic surface. The idea of grout lines interrupting that clean look is frustrating. But pushing tiles together without any space is a recipe for disaster.
Tiles need gaps, or grout lines, to accommodate for slight size variations from manufacturing and to allow for natural expansion and contraction. Without this space, temperature changes can cause tiles to push against each other, leading to cracking, lippage, or even lifting off the floor.
I remember a client a few years back who was absolutely set on having zero grout lines5 for his new living room floor. He wanted it to look like a single slab of marble. Despite my advice, he insisted.
The installation looked flawless for the first few months. Then, the first heatwave of summer hit. I got a frantic call. Two tiles in the middle of the room had popped up, creating a dangerous and ugly tent-like shape. The tiles had expanded in the heat, and with nowhere to go, they pushed each other up. It was a costly lesson.
This is why that little gap is non-negotiable. Here’s a deeper look at the reasons.
The Science of Thermal Expansion
Everything expands when it gets warm and shrinks when it gets cool. Your house, the subfloor, and the tiles themselves are all moving, even if you can't see it. The grout line acts as a flexible buffer zone6. It absorbs this movement, protecting the tiles from immense pressure. Without it, the tiles take on that stress directly.
Imperfections in Manufacturing
Even with our advanced manufacturing technology, no two tiles are ever exactly the same size. We're talking about fractions of a millimeter, but when you lay hundreds of tiles side-by-side, these tiny differences add up. A grout line helps to absorb and hide these small variations, allowing the tiler to create a visually straight and even layout.
A Stronger Bond
Grout does more than just fill a gap. It flows into the space and bonds with the edges of the tiles and the thin-set mortar below. This creates a single, strong, and rigid surface. It locks everything in place, preventing individual tiles from shifting or coming loose over time.
How wide should my grout lines be for different grout types?
You've accepted that grout lines are necessary. Now the big question is, how wide? You know that the type of grout you plan to use is a major factor in this decision.
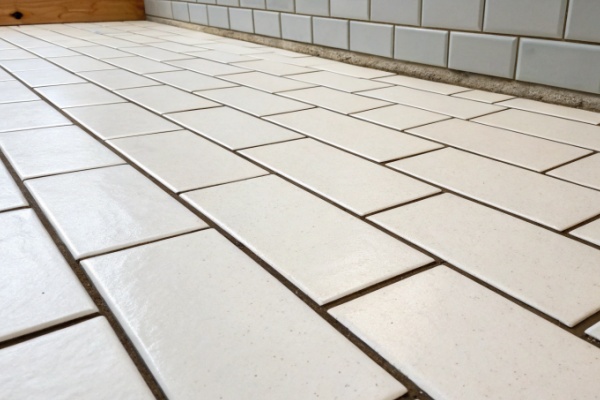
For modern epoxy grout7, you need a gap of at least 1.5mm to 2mm for the material to fill the joint properly. For traditional cement-based grout8, a 1mm to 1.5mm gap can work, but matte or antique-style tiles often require much wider gaps, up to 5mm.
The decision between traditional grout and modern epoxy grout7 is a common one for our clients. It really comes down to budget, maintenance, and aesthetics.
I always tell them to think about the grout line width4 before the first tile is laid. If you want to use epoxy grout7 for its stain resistance but your tiler only leaves a 1mm gap, you're going to have a big problem. The epoxy is too thick to penetrate such a small space. Communication with your installer is everything.
Let's break down the requirements for each type so you can plan effectively.
Understanding Grout Types
First, we need to know what we're working with. The two main categories are traditional cement-based grout8 and modern epoxy grout7.
- Cement-Based Grout: This is the traditional mix of cement, water, and sometimes sand. It's affordable and widely used. It is porous, however, and can stain if not sealed regularly.
- Epoxy Grout: This is a two-part system with a resin and a hardener. It's non-porous, highly durable, and resistant to stains and chemicals. It's more expensive and can be trickier to install.
Recommended Grout Widths
The ideal width depends on your tile and your chosen grout. Here is a simple guide to help you decide.
| Grout Type | Recommended Minimum Width | Recommended Maximum Width | Best For |
|---|---|---|---|
| Epoxy Grout | 1.5 mm | 3 mm | Kitchens, bathrooms, high-traffic areas where stain resistance is key |
| Cement Grout | 1 mm | 1.5 mm | General applications, budget-conscious projects |
| Special Tiles | 5 mm | 10 mm | Rustic, antique-look, or handmade tiles with irregular edges |
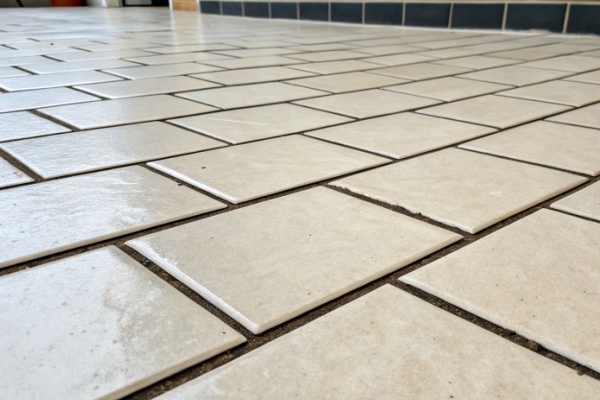
As a general rule for most of the porcelain tiles we produce, a 2mm to 2.5mm gap is the sweet spot. It's wide enough for epoxy grout7 to fill properly, but still narrow enough to give a modern, clean look. It provides the perfect balance between aesthetics and technical necessity.
How do I choose the right color and texture for my grout?
You've decided on the width, but now comes the artistic part. Should the grout blend in or stand out? Should it be smooth or have a texture? This choice dramatically changes the final look.
To make grout lines disappear, choose a color that closely matches your tile. To create a bold pattern and highlight the tile shape, select a contrasting color. For the finish, match smooth epoxy to glossy tiles and sanded epoxy to matte or textured tiles.
I've learned that grout color can make or break a design. One of our partners was developing a new line of wood-look porcelain tiles. In the showroom, they first used a dark, contrasting grout. The result looked like a grid, completely ruining the natural wood illusion. We suggested a matching, warm-brown grout instead.
The change was incredible. The grout lines vanished, and the floor looked like a continuous expanse of real hardwood. This experience taught me that the finish is just as important as the color. A glossy grout next to a matte tile can look just as out of place.
Let's explore how to make the perfect aesthetic choice for your project.
Blending vs. Contrasting
Your first decision is about visual impact.
- To Blend (Weaken the Gap): Choose a grout color that is in the same color family as your tile. This is perfect for creating a seamless, uniform look. It's the best choice for tiles that mimic natural materials like marble or wood, as it enhances the illusion.
- To Contrast (Highlight the Gap): Choose a color that stands out against your tile. A classic example is white subway tiles with black grout. This approach emphasizes the shape of each tile and creates a graphic, linear pattern. It works well for geometric layouts or to add a bold design element to a room.
Matching Texture and Finish
The texture of the grout should complement the surface of the tile. This is especially important when using modern epoxy grout7s, which come in different finishes.
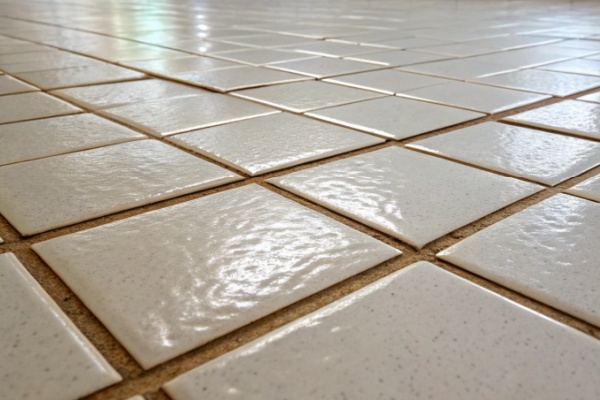
- For Polished/Glossy Tiles: Use a smooth, glossy epoxy grout7. The reflective surfaces will match, creating a cohesive and elegant look. A sanded or matte grout would look dull and out of place against the shiny tile.
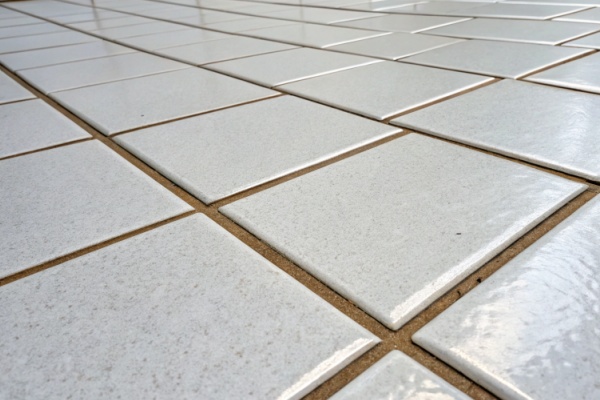
- For Matte/Textured Tiles: Use a matte or sanded-finish epoxy grout7. This includes tiles like our cement-look, stone-look, or wood-look porcelain. The matte finish of the grout will blend seamlessly with the non-reflective surface of the tile, enhancing its natural appearance. Using a glossy grout here would create distracting, shiny lines.
What are the key steps for a perfect epoxy grout7 application?
You’ve chosen your tile, the grout width, the color, and the texture. Now, it's all about execution. A poor application can ruin even the best materials and planning.
A perfect epoxy grout7 application requires three critical steps. First, thoroughly clean the joint to a depth of at least 3mm. Second, apply the epoxy, ensuring the joint is filled completely and solidly. Third, clean up the excess promptly before it cures.
As a manufacturer, our responsibility doesn't end when the tiles leave our factory. We want to see them installed beautifully. That's why we always emphasize the importance of proper grouting technique to our clients.
The most common failure I see with epoxy grout7 comes from rushing the preparation. An installer once tried to save time by not cleaning the joint9s properly. Dust and debris got mixed in with the epoxy. The grout failed to bond correctly and started chipping away within a year. It's a simple step, but skipping it is a huge mistake.
Here are the essential steps to ensure a durable and beautiful finish.
Step 1: Meticulous Cleaning
This is the foundation of a good grout job. Any dust, debris, or moisture left in the joint will weaken the bond of the epoxy.
- Depth is Key: The joint must be cleared to a depth of at least 3mm. This ensures there is enough space for the grout to sit in and form a strong, solid body. A shallow application is just a thin layer on top that will easily crack or peel away.
- Clean Thoroughly: Use a vacuum and a stiff brush to remove every last bit of dust from the bottom and sides of the joint.
- Grind the Edges: For the best possible adhesion, it's a good practice to lightly grind the inside edges of the tile. This roughs up the smooth, glazed edge, giving the epoxy a better surface to grip.
- Ensure it's Dry: Epoxy and water don't mix. The joint must be completely bone-dry before you begin. We recommend waiting 7-10 days after tiling to let all moisture from the thin-set evaporate.
Step 2: Solid Application
Applying the epoxy grout7 itself requires care and attention.
- Fill Completely: When you apply the epoxy, your goal is to fill the joint from the bottom up. Make sure the material is packed in tightly, leaving no air pockets or voids.
- Don't Skimp: It's tempting to use less material by just skimming a thin layer over the top of the joint. This is a critical error. This thin layer has no structural integrity and will fail quickly. A solid, fully packed joint is what provides the durability epoxy is known for.
Conclusion
Choosing the right grout line width4 is a balance. It's about respecting the technical needs of the tile while achieving your desired look. A 1.5mm to 2.5mm gap10 is usually best.
Understanding the tightest recommended grout line helps ensure the durability and aesthetic appeal of your tile installation. ↩
Knowing about tile size variations helps in planning the correct grout line width for a seamless look. ↩
Learning about thermal expansion can prevent costly tile damage and ensure a long-lasting installation. ↩
Choosing the right grout line width is crucial for both the appearance and longevity of your tile installation. ↩
Understanding the risks of zero grout lines can prevent future tile damage and costly repairs. ↩
A flexible buffer zone absorbs movement, protecting tiles from pressure and potential damage. ↩
Epoxy grout offers durability and stain resistance, making it ideal for high-traffic areas. ↩
Cement-based grout is affordable and widely used, but requires regular sealing to prevent stains. ↩
Proper joint cleaning ensures a strong bond and prevents grout failure. ↩
A 1.5mm to 2.5mm gap provides the perfect balance between aesthetics and technical necessity for porcelain tiles. ↩
