If you’re ready to grout wall tiles in a shower but not sure where to start, you’ve come to the right place. Mastering the right techniques—from choosing between sanded vs. un-sanded grout, picking the perfect color, to applying and sealing—can make all the difference in durability and style. Whether you’re a DIY enthusiast or tackling your first bathroom update, this guide will give you clear, actionable steps to ensure your shower looks flawless and stands up to moisture. Let’s get those grout lines sharp and your shower sealed tight!
Choosing the Right Grout for Shower Wall Tiles
Selecting the correct grout is the foundational step for any successful shower installation. The right formula ensures structural integrity, prevents moisture damage, and dictates the final aesthetic of your shower walls. You must evaluate the width of your grout lines, the material of your tile surface, and your preferred application method to make the right choice.
Sanded vs. Un-sanded Grout
The width of the space between your tiles dictates whether you need sanded or unsanded grout. Using the wrong type will lead to cracked joints or scratched tiles.
| Feature | Sanded Grout | Unsanded Grout |
|---|---|---|
| Ideal For | Grout lines 1/8 inch or wider. | Grout lines smaller than 1/8 inch. |
| Tile Surface Compatibility | Ceramic, porcelain, natural stone. | Glass, polished marble, delicate tiles. |
| Key Advantage | High durability; sand prevents shrinkage in wide gaps. | Smooth texture; clings effectively to vertical walls. |
| Primary Drawback | Abrasive texture can scratch easily damaged tiles. | Lacks structural support for wide joints, leading to cracks. |
Pre-mixed vs. Powder Grout Options
Once you determine the texture, you must choose the delivery method. Both options are effective for DIY tiling, but they cater to different project scopes and budgets.
- Powdered Grout: The industry standard. It requires manual mixing with water or latex additives. It is highly cost-effective for large projects and allows you to mix only what you immediately need.
- Pre-mixed Grout: Offers ultimate convenience and guaranteed color consistency. While slightly more expensive, it eliminates mixing errors, reduces prep time, and often features advanced stain-resistant polymers right out of the bucket.
Selecting the Best Grout Color
Grout color is a powerful design element that fundamentally changes how your shower walls look.
- Matching Colors: Blending the grout color with the tile creates a seamless, monolithic appearance. This approach minimizes visual clutter and makes small showers feel more expansive.
- Contrasting Colors: Using a dark grout with a light tile (or vice versa) frames each individual tile, highlighting the geometric pattern and layout.
- Maintenance Considerations: Pure white grout requires diligent cleaning to prevent discoloration from shampoo and mildew. Medium grays, taupes, and darker shades are highly recommended for high-traffic showers to naturally mask daily wear and water stains.
Essential Tools to Grout Wall Tiles in a Shower
Before you start filling those joints, you need to gather the right gear. From my experience with DIY tiling, I know that having the exact tools ready before you start prevents messy mistakes and protects your new tile surface from accidental damage.
Necessary Grouting Tools
To get a flawless finish, you only need a few specialized items. Here is the toolkit I always rely on:
- Rubber Grout Float: This is your primary tool. Look for a float with firm, rounded edges to press the mixture deeply into the grout lines without scratching the tiles.
- Two Large Buckets: Keep one bucket dedicated to mixing your grout (whether you are using a sanded or unsanded grout formula) and the second bucket for clean water.
- Margin Trowel: This narrow trowel is perfect for stirring your grout mix to the right consistency and easily scooping it onto your float.
- Utility Knife or Grout Saw: Keep one handy just in case you spot any dried tile adhesive poking through the joints that needs to be scraped out before you begin.
Cleaning and Preparation Supplies
The cleanup phase is what actually makes your shower look professional. Here are the cleaning supplies I make sure to have within arm’s reach:
- Heavy-Duty Grout Sponges: Do not substitute these with standard kitchen sponges. You need dense, rounded tile sponges to wipe away the excess without pulling wet grout out of the joints.
- Microfiber Cloths: These are absolute lifesavers for buffing out the powdery grout haze once the surface dries.
- Painter’s Tape and Plastic Sheeting: Use these to tape off the tub, shower pan, and nearby fixtures to catch any falling debris.
- Protective Gear: Always wear thick rubber gloves to stop the chemicals from drying out your hands, and use safety glasses to keep the fine dust out of your eyes during the mixing process.
Preparing to Grout Wall Tiles in a Shower
When I tackle a DIY tiling project, I know preparation is what makes or breaks the final result. Setting up the shower area correctly guarantees the grout adheres properly and keeps the rest of your bathroom safe from damage.
Cleaning the Tile Joints
Before I start mixing anything, I make sure the grout lines are completely clear. Any leftover tile adhesive, dust, or forgotten spacers will weaken the grout’s bond and ruin the finish.
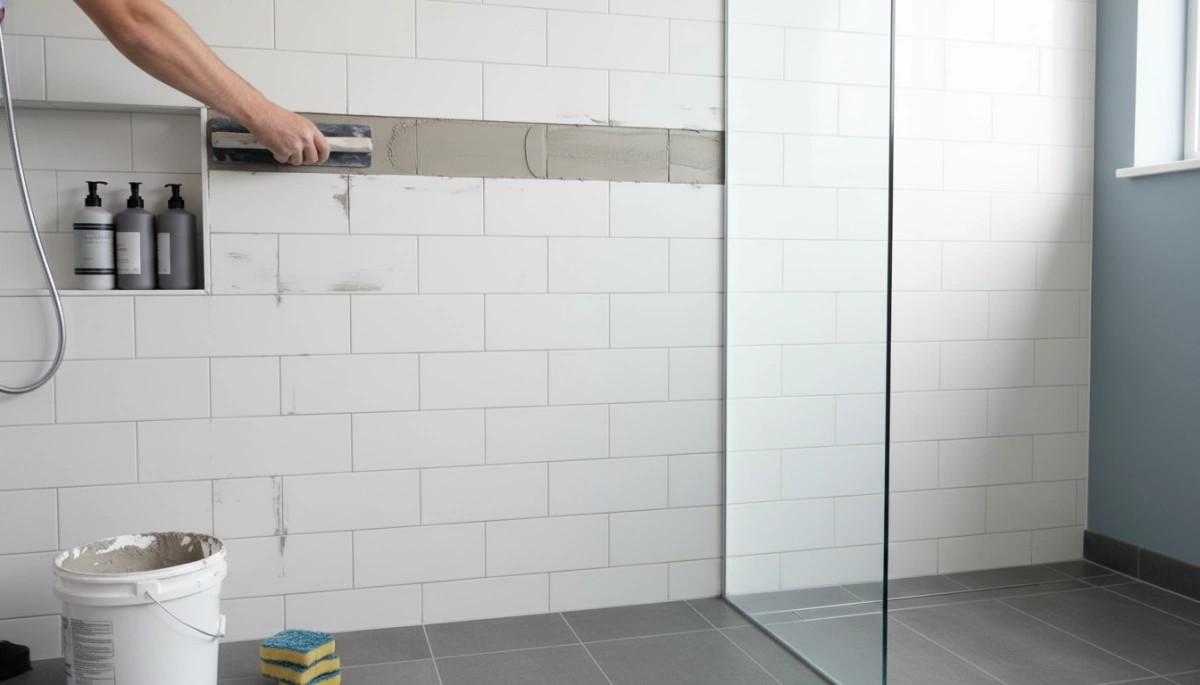
- Scrape the joints: I run a utility knife or a rigid scraping tool between every tile to carve out excess thin-set.
- Vacuum the dust: I use a wet/dry vac to suck up all loose debris directly from the wall crevices.
- Wipe down: I drag a lightly damp sponge across the tile surface to pick up any lingering microscopic dust.
Protecting the Tub and Fixtures
Whether I am working with unsanded grout or a heavier sanded mix, the process gets messy. I always protect the surrounding fixtures to prevent permanent scratches or stains.
- Tape the edges: I apply quality painter’s tape directly along the tub rim, the ceiling line, and around all metal shower fixtures.
- Cover the base: I lay a thick canvas drop cloth or heavy-duty plastic flat over the shower pan or bathtub.
- Seal the drain: I tape completely over the shower drain to ensure no stray grout clumps fall in and cause a costly plumbing clog.
How to Mix Shower Tile Grout Properly
Getting the consistency right is half the battle when learning how to grout wall tiles in a shower. If your mix is too runny, it won’t hold; if it’s too dry, it won’t bond properly. I treat mixing grout like baking—precision matters more than speed.
Following Manufacturer Instructions
I cannot stress this enough: read the bag. Every brand has a slightly different water-to-powder ratio, and guessing usually leads to a weak installation. Whether you are using sanded or unsanded grout, start with a clean bucket and clean water. Contaminants can mess with the color and the chemical cure.
Here is my standard mixing process for a solid DIY tiling result:
- Start with water: Pour the recommended amount of water into the bucket first. This prevents dry powder from getting stuck in the bottom corners.
- Add powder slowly: Gradually add the grout powder while mixing.
- Mix thoroughly: Use a margin trowel for small batches or a drill with a mixing paddle for larger ones. Run the drill at a low speed to avoid whipping air bubbles into the mix, which creates weak spots in your grout lines.
- Check the consistency: You are looking for a peanut butter or toothpaste consistency. It should hold its shape on the trowel without dripping off, but still be smooth enough to spread easily.
- Let it slake: This is the step most people skip. Let the mixture sit undisturbed for about 10 minutes. This allows the chemicals to fully activate. After the wait, give it one final quick mix without adding more water.
Understanding Grout Working Time
Once that water hits the powder, the clock starts ticking. This is known as the “pot life” or working time. For most standard cement-based grouts, you have about 30 to 60 minutes before the mixture starts to harden in the bucket.
- Don’t mix too much: If you are working alone, only mix as much as you can apply in 30 minutes. It is better to mix multiple small batches than to rush and do a sloppy job because your grout is setting up.
- Watch the temperature: Hot days or hot water will make the grout set faster. Cold conditions will slow it down.
- Do not add water later: If the grout starts getting stiff in the bucket while you are working, do not add more water to loosen it up. This is called “re-tempering,” and it destroys the structural integrity of the grout, leading to cracking and color variation later. If it’s too hard to spread, throw it out and mix a fresh batch.
Step-by-Step Guide to Applying Grout
I always tell people that the actual application is the most satisfying part of DIY tiling. Once your mix is ready, getting it onto the wall requires a bit of technique, but it is straightforward once you find your rhythm.
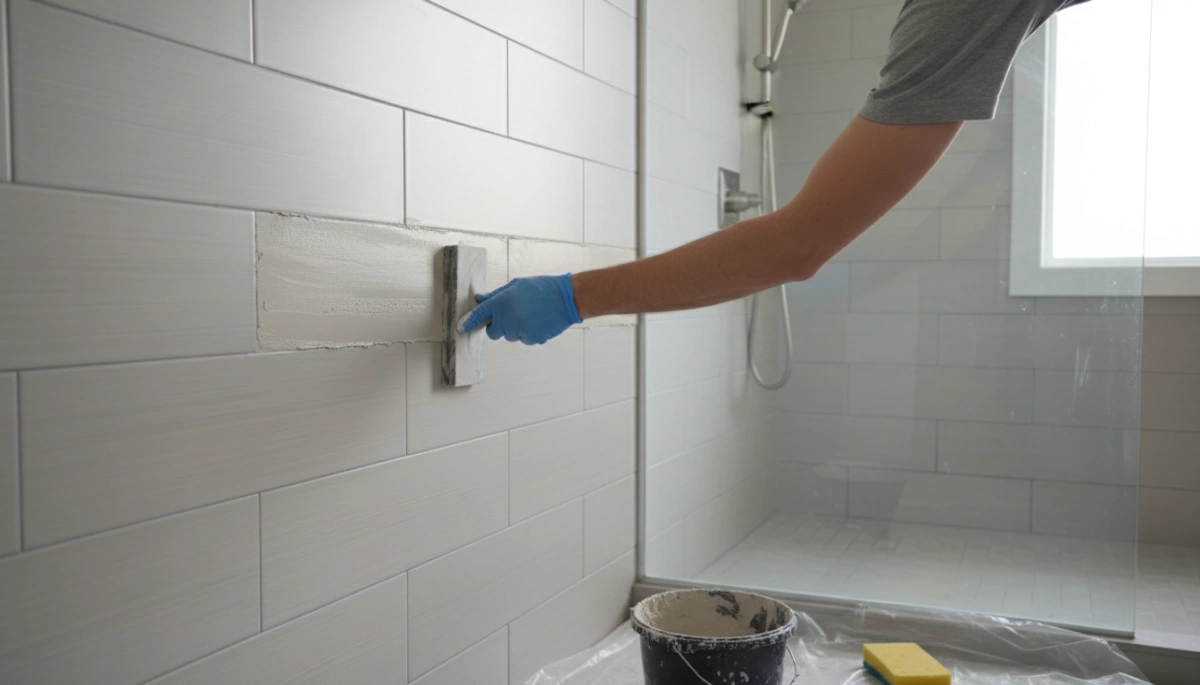
Using the Grout Float Correctly
Your grout float is the most important tool you have right now. Holding and moving it correctly dictates how well the grout fills the joints and how much mess is left on the tile surface.
- Hold at a 45-degree angle: Grip the handle firmly and angle the rubber pad at 45 degrees to the wall. This is the sweet spot for picking up the material and pushing it deeply into the gaps.
- Swipe diagonally: Always glide the float diagonally across the grout lines. If you move parallel to the joints, the edge of the float will dig directly into the gap and pull the wet grout right back out.
Spreading and Packing the Grout Lines
The main goal here is to completely fill the gaps, leaving absolutely no air pockets behind. Whether your specific shower project calls for sanded or unsanded grout, the packing process remains exactly the same.
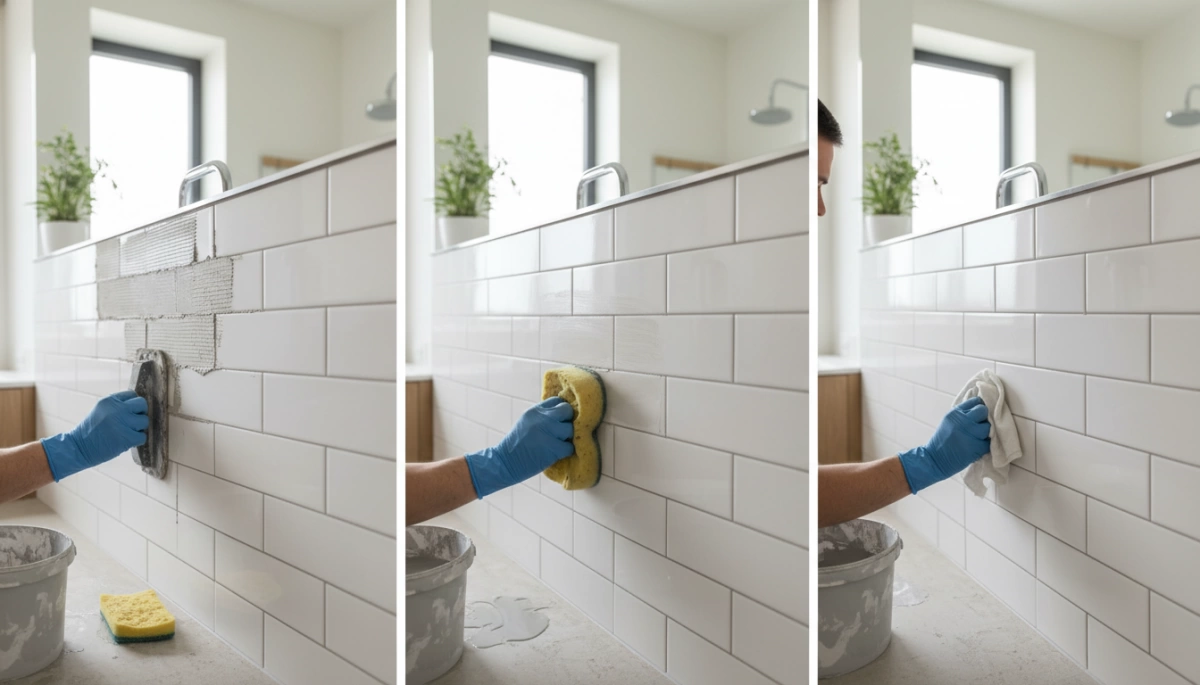
- Smear and press: Scoop a generous amount of grout onto your float and smear it across the wall. Press hard. I make sure to pack the material firmly so it reaches all the way back to the dried tile adhesive.
- Work in small sections: Do not try to cover the entire shower at once. Work in manageable 3×3 foot areas so the grout does not start curing before you can move on to the cleaning phase.
- Scrape the excess: After the grout lines are packed tight, tilt your float to a sharp 90-degree angle. Scrape it diagonally across the tiles to sheer off the excess bulk. The cleaner you leave the tile surface right now, the easier your final wipe-down will be.
Cleaning the Tiles and Removing Grout Haze
When figuring out how to grout wall tiles in a shower, the cleanup phase is just as critical as the application. If you are handling a DIY tiling project, pacing yourself here prevents ruining your fresh work.
The Initial Sponge Wipe-Down
I wait about 15 to 30 minutes before starting this step. The mixture needs to firm up in the grout lines first so you don’t wash it away.
- Squeeze it out: Use a barely damp sponge. Too much water weakens the joints and washes out the color.
- Work diagonally: Always swipe across the tiles at a 45-degree angle. This keeps the sponge from digging into the wet joints and pulling material out.
- Keep it clean: Change your rinse water frequently to get the tile surface as clean as possible right from the start.
Buffing Away Stubborn Grout Haze
Once the wall dries, you will inevitably notice a cloudy film left behind on your tiles. This is completely normal and happens with both sanded and unsanded grout.
| Buffing Step | Action Needed |
|---|---|
| 1. Let it Dry | Wait about 2 to 3 hours until the cloudy haze is completely dry to the touch. |
| 2. Dry Buff | Grab a clean, dry microfiber cloth or cheesecloth to vigorously wipe down and polish the tiles. |
| 3. Deep Clean | If cloudy spots or stray bits of old tile adhesive remain after 24 hours, wipe the area with a commercial grout haze remover. |
Steps on How to Grout Wall Tiles in a Shower: Sealing and Caulking
When and How to Apply Grout Sealer
Finishing your DIY tiling project means protecting your hard work. Whether your setup required sanded or unsanded grout, sealing is mandatory to keep moisture and mold out of the joints.
- Wait for a full cure: Just as you patiently let the tile adhesive set before applying grout, you must let the fresh grout dry for 48 to 72 hours before applying sealer.
- Target the application: I prefer using a small foam brush or a roller applicator bottle to trace the sealer directly onto the grout lines.
- Wipe off excess: Immediately buff away any stray sealer that gets onto the tile surface to prevent cloudy streaks from drying on the glaze.
Caulking the Shower Corners and Seams
Never pack grout into the corners of your shower. Walls naturally shift, and rigid grout will quickly crack out of these spaces.
- Use 100% silicone: Apply a thick bead of waterproof, mold-resistant silicone caulk in all 90-degree vertical corners.
- Seal the base: Run a line of caulk along the bottom seam where the wall tiles meet the shower pan or bathtub.
- Smooth the line: I drag a wet fingertip or a caulking tool lightly along the bead to press it into the seam for a clean, watertight finish.
Proper Drying and Curing Times
Do not turn on the water yet. Rushing the final cure will ruin the entire installation.
- Sealer drying: Give the newly applied grout sealer at least 24 hours to dry completely.
- Caulk curing: Wait a full 24 to 48 hours for the silicone caulk to completely cure and form a watertight barrier.
- The final test: Ensure all seams, corners, and joints are completely dry and solid to the touch before using the shower for the first time.
